MWatch (Wi-Fi)

来自Microduino Wikipedia
1304410487@qq.com讨论 | 贡献2015年10月30日 (五) 06:44的版本 (Created page with "{{Language| mWatch (Wi-Fi)}} {| style="width: 800px;" |- | ==Objective== Here we use mCookie to build a simple watch, which can synchronize the time automatically in the WiFi ...")
(差异) ←上一版本 | 最后版本 (差异) | 下一版本→ (差异)
跳转至: 导航搜索
Language English

Objective

Here we use mCookie to build a simple watch, which can synchronize the time automatically in the WiFi environment.

Principle

We add the WIFI module in the tutorial, which can connect to the pre-set network after the power-up of the mWatch. When it is connected, the mWatch will synchronize network time automatically. And then acquiring time through the RTC module and displaying it on the OLED screen.

Equipment

Module Number Function
mCookie-CoreUSB 1 Core board
mCookie-RTC 1 Time clock module
mCookie-WiFi 1 Networking module
mCookie-OLED 1 OLED display
Microduino-BM 1 Battery management

Preparation

  • Setup 1:Connect the CoreUSB to the PC/Mac with a USB cable and then open Arduino IDE.
  • Setup 2:Click Files > Examples > mCookie > _301_mWatch_WiFi, and download the program.
  • Setup 3:Load the code and copy the program to IDE; Select the right board and COM port for program download; When it pops up "Done Uploading" notice, it means the program has been written into the CoreUSB.

Program Description

  • Acquire network time function: " updateTimeData()"--Execute the statement to get the network time.
  • Acquire RTC time function: " getRTC()"--Execute the statement to get RTC time.
  • RTC time adjusting function: " setRTC()"--Execute the statement to re-set the RTC time.
  • Notice for network connection initializing can be displayed by the OLED screen. (Inside setup() function.)
    • Search for network: If successful, it'll pop up notice " softap ok " or it'll show " softap err ".
    • Join in network: If successful, it'll show notice " Join AP success " or it'll show " Join AP failure ".
    • Note for time acquiring: If successful, it'll be displayed on the OLED.

Code Debugging

  • Find this section of code above in the main program, enter WiFi user name and password in "". So it can connect to the internet and get precise time information.
  • Find this section of code above from the rtc.h program, modify it as your time zone; Load the program to the CoreUSB after modifying and get precise time under WiFi environment.

Hardware Buildup

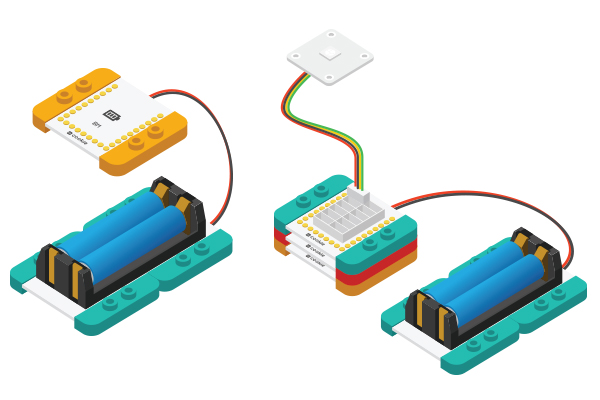
  • Setup 1:Connect the activated battery box and BM module.
CoreUSB Ble steup2.jpg
  • Setup 2:Stack all modules together without fixed order and finish circuit buildup.

Result

Data and week is displayed on the first line; Time is displayed on the second line; Custom text is displayed on the third line.

Video