Microduino W5500 Network (6)
PurposeThis course will show you how to sue UDP (User Datagram Protocol) to communicate with Microduino-W5500. Equipment
UDPUDP is short for User Datagram Protocol—a connectionless transmission level protocol in OSI reference model, providing transaction oriented simple unreliable message delivery service. It is formally defined in IETF RFC 768. Schematic
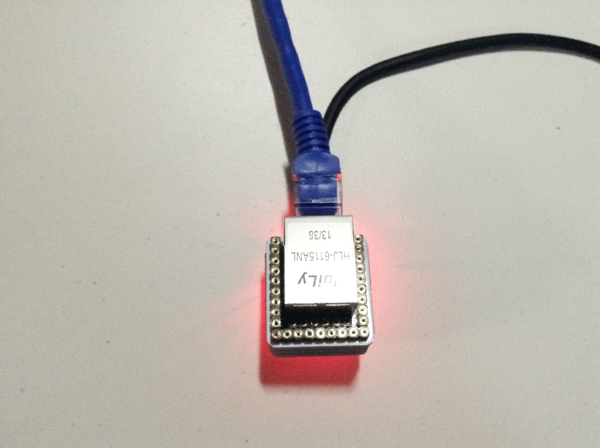
Stack them and plug in the cable. As follows: ProgramDebuggingStep 1: First, make sure you have _02_Microduino_Ethernet_WIZ library in your IDE and put it into libraries folder of your IDE. Step 2: If there still exists the previous Ethernet library in your libraries folder, it needs to be deleted since the previous Ethernet is compiled according to W5100. Then, you need to change _02_Microduino_Ethernet_WIZ file so that the library function could be corresponding with Microduino-W5500: First find w5100.h of utility in _02_Microduino_Ethernet_WIZ library. Change #define wiz_cs_pin 8 //CS_PIN of the code to #define wiz_cs_pin 10 //CS_PIN. Step 3: Interpret the code: // if there's data available, read a packet
int packetSize = Udp.parsePacket();
if(packetSize)
{
Serial.print("Received packet of size ");
Serial.println(packetSize);
Serial.print("From ");
IPAddress remote = Udp.remoteIP();
for (int i =0; i < 4; i++)
{
Serial.print(remote[i], DEC);
if (i < 3)
{
Serial.print(".");
}
}
Serial.print(", port ");
Serial.println(Udp.remotePort());
//Judge if there is any data from code above. If there is, IP address and port number of the client will be output through the serial port.
   // read the packet into packetBufffer
   Udp.read(packetBuffer,UDP_TX_PACKET_MAX_SIZE);
   Serial.println("Contents:");
   Serial.println(packetBuffer);

   // send a reply, to the IP address and port that sent us the packet we received
   Udp.beginPacket(Udp.remoteIP(), Udp.remotePort());
   Udp.write(ReplyBuffer);
   Udp.endPacket();
 }
 delay(10);
 //Message read and transmitted from the code above is input through the serial port and responds “acknowledged” to the client.
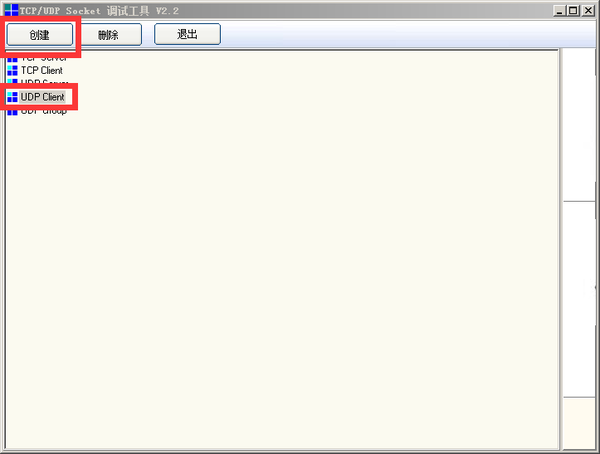
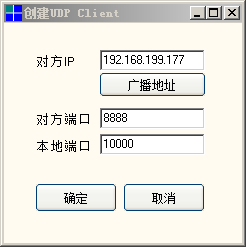
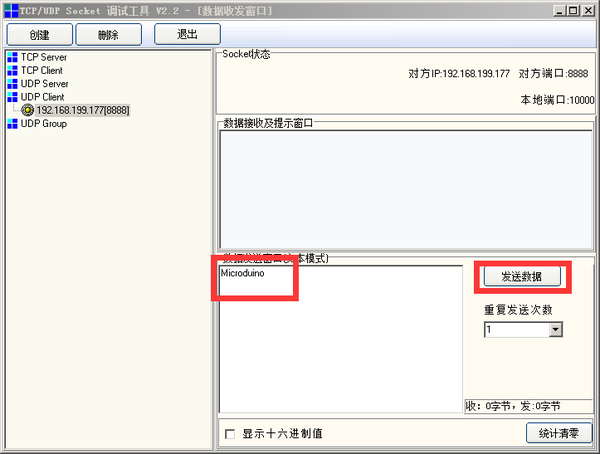
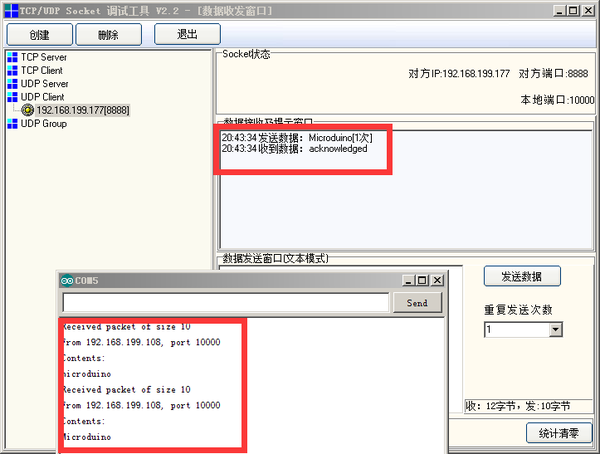
Step 4: Download the code and compile. Step 5: Test: SocketTool sends UDP packet. Open SocketTool, select UDP client and click to create. Input IP and port of the opposite side in the pop-up dialog box. Input messages in data sending box and send. The receiving box will show “acknowledged”. ResultHere we got a UDP receiver by Microduino-W5500, capable of receiving message and replying. Video |
