Fortune Cat

来自Microduino Wikipedia
Radiumray9@gmail.com讨论 | 贡献2015年10月15日 (四) 03:16的版本 (Created page with "{{Language|Fortune Cat}} {| style="width: 800px;" |- | ==Overview== When someone passed by, Fortune cats eyes shine waving to you, will wow oh. File: MicroduinoFortuneCat-...")
(差异) ←上一版本 | 最后版本 (差异) | 下一版本→ (差异)
跳转至: 导航搜索
Language English

Overview

When someone passed by, Fortune cats eyes shine waving

to you, will wow oh.

Schematic

The body will send pyroelectric infrared, sensor can

detects it, when the sensor detects, will control lights

change color, and the Audio module to play audio.

Equipment

Module Number Function
mCookie-CoreUSB/zh 1 Core board
mCookie-Hub/zh 1 sensor hub board
Microduino-TOUCH/zh 1 touch sensor
Microduino-PIR/zh 1 PIR sensor
mCookie-Audio/zh 1 Audio module
mCookie-Amplifier/zh 1 Power Amplifier module
Microduino-Color led/zh 2 led light
mCookie-BM/zh 1 Battery Management
Servo 1 Servo

Preparation

  • Setup 1:Connect the CoreUSB module to your computer

and then start the Arduino IDE.

  • Setup 2:点击Files > Examples > mCookie >

_303_FortuneCat.

  • Setup 3:Click upload to upload the program. When

"Done Uploading" appears, the program should have

successfully been uploaded into the CoreUSB.

Program description

  • Control pin definitions
#define humanHotSensor 4//PIR sensor pin number
#define PIN 6//color light pin number
#define SERVOPIN SDA//servo pin

Adafruit_NeoPixel strip = Adafruit_NeoPixel(1, PIN, 

NEO_GRB + NEO_KHZ800);
  • Detection of human IR and play audio, control servos
if (humanHotState) {
    colorWipe(strip.Color(125, 125, 125));
    updateServo();

    if (!playing) {
      Serial.println("play sound.....");
     // audio_play();
     audio_choose(1);
      playing = true;
    }
  }

Hardware Buildup

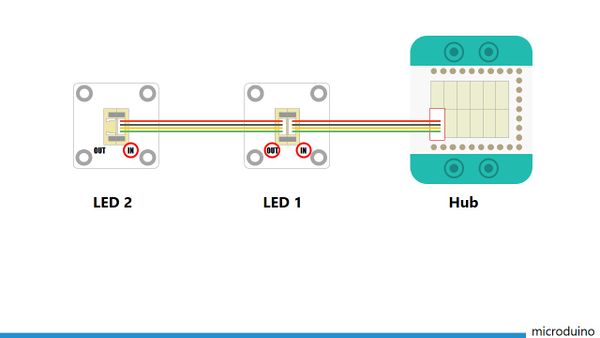
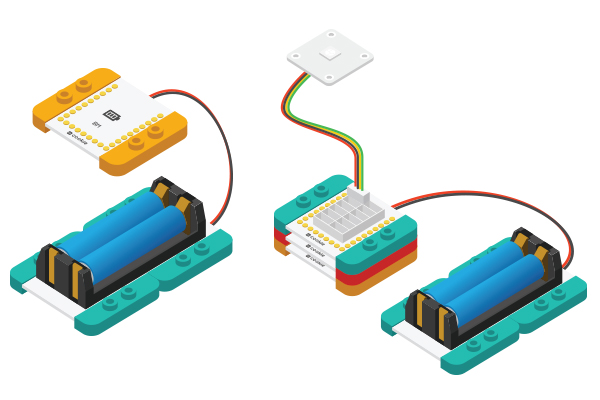
  • Setup 1:Using the below diagram as reference, connect

the sensors into the corresponding ports on the Hub

module.

To connect muliple LEDs in a series, follow the above

diagram. Notice that the sensor cable connects to the IN

ports of the LEDs. You can support up to six LEDs!

CoreUSB Ble steup11.jpg
  • Setup2:Connect the servo to the Servo Connector. Then

connect that to the IIC port in the Hub module.

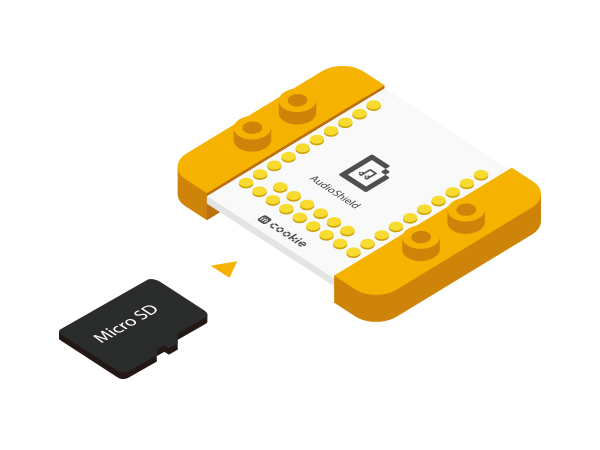
  • Setup 3:Insert a micro SD Card into the Audio Shield.
MusicBox Joystick TF.jpg
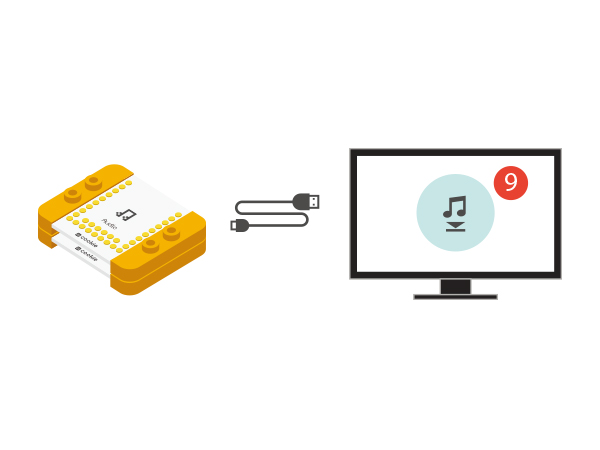
  • Setup 4:Stack the Audio Shield and Audio modules.

Then, copy a single greeting sound onto the micro SD card.

MusicBox Joystick song.jpg
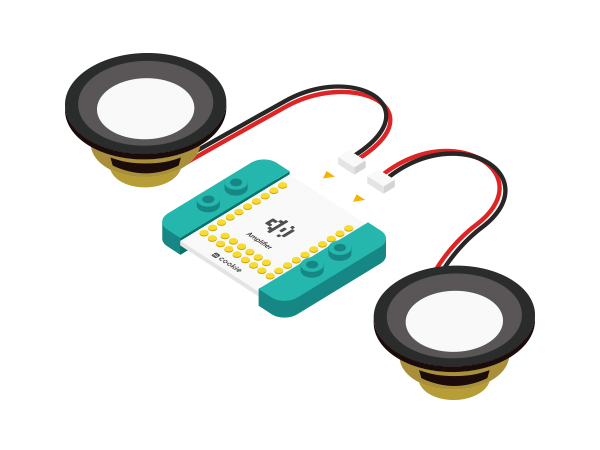
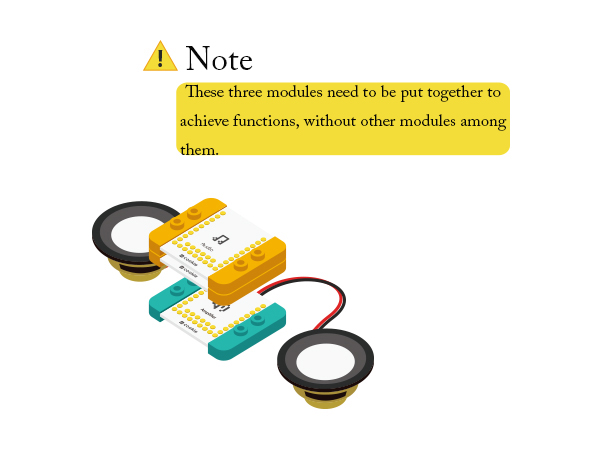
  • Setup 5:Connect two speakers to Amplifier module.
MusicBox Joystick song speak.JPG
  • Setup 6:Stack the Amplifier, Audio, and Audio Shield

modules.

MusicBox Joystick 3 speak.JPG
  • Setup 7:Connect the activated Battery module to your

battery Management module.

CoreUSB Ble steup2.jpg
  • Setup 8:All modules are stacked together, in any order

(except Audio, AudioShield and Amplifier three together),

Congratulation, the circuit part to build complete!

Result

If someone passby Fortune cat, she will wave to you, eyes will light up and beep.

Video