“Microduino-W5500”的版本间的差异
(Created page with "800px|thumb|center|Microduino-W5500 ==Documents== *Eagle PCB '''File:Microduino-W5500.zip''' ==Development== Arduino libraries and su...") |
(→Features) |
||
| (未显示同一用户的6个中间版本) | |||
| 第1行: | 第1行: | ||
| − | [[file:Microduino-W5500-pin-2.jpg|800px|thumb|center|Microduino-W5500]] | + | {{Language|Microduino-W5500}} |
| + | {| style="width: 800px;" | ||
| + | |- | ||
| + | | | ||
| + | [[File:Microduino-W5500-rect.jpg|400px|thumb|right|Microduino-W5500]] | ||
| + | Microduino-W5500 is the Ethernet control module, developed by adopting W5500 network chip. Only when Microduino-W5500 is stacked with Microduino-RJ45 can it form a | ||
| + | complete network module. It can not be used individually. | ||
| + | |||
| + | |||
| + | |||
| + | |||
| + | |||
| + | |||
| + | |||
| + | |||
| + | |||
| + | |||
| + | ==Features== | ||
| + | *Microduino-W5500 is a brand new all-hardware TCP / IP protocol stack network chip after W5100, W5200 and W5300. It is the best choice of the embedded Ethernet with lower power consumption and operation temperature as well as improved workmanship | ||
| + | *Adopting U-shaped 27-pin Microduino standard interface, Microduino-W5500 can be stacked with Microduino-RJ45 and be delivered ready to plug in, making it smaller. | ||
| + | *With open source hardware circuit design, Microduino-W5500 is compatible with Arduino IDE development environment. | ||
| + | *With uniform Microduino interface specification and rich peripheral modules, it is very convenient and flexible for Microduino-W5500 to quickly connect with other modules and sensors corresponding with Microduino interface specification. | ||
| + | *2.54mm (0.1 inch) pin pitch, compatible to pegboard. | ||
| + | |||
| + | ==Specification== | ||
| + | *Communication Protocol | ||
| + | **Supporting hardware TCP/IP protocol: TCP, UDP, ICMP, IPv4, ARP, IGMP, PPPoE | ||
| + | **Supporting eight independent ports(Socket) for simultaneous communication | ||
| + | **Embedded 10BaseT/100BaseTX Ethernet PHY | ||
| + | **Supporting automatic negotiation (10/100-Based full and Half-Duplex modes) | ||
| + | |||
| + | *Operation Features | ||
| + | **Supporting power down mode | ||
| + | **Supporting WOL | ||
| + | **Supporting automatic reply(full and half-duplex modes) | ||
| + | |||
| + | *Update Speed | ||
| + | **Supporting high-speed serial peripheral interface | ||
| + | **32K bytes inside for sending and receiving cache | ||
| + | |||
| + | *Interface Features | ||
| + | **TTL level input | ||
| + | **Single power supply: 3.3V; | ||
| + | **Not supporting IP fragmentation | ||
| + | |||
| + | Status Indication | ||
| + | **Two programmable LED outputs used for connecting, sending, receiving conflicts as well as full and half-duplex modes. | ||
| + | |||
| + | *Pin Description: | ||
| + | {|class="wikitable" | ||
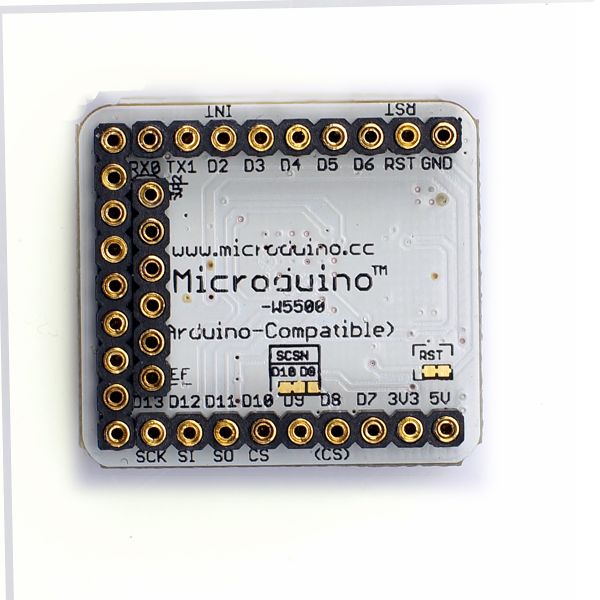
| + | ! rowspan="1" | Pin Name of Microduino-W5500 ||Microduino Pins || Function | ||
| + | |- | ||
| + | | SO || D11|| Data output of SPI interface | ||
| + | |- | ||
| + | | SI|| D12|| Data input of SPI interface | ||
| + | |- | ||
| + | | SCK|| D13|| Clock input of SPI interface | ||
| + | |- | ||
| + | | CS||D10/D8 || Chip select input of SPI interface | ||
| + | |- | ||
| + | | RESET|| RESET|| Reset input | ||
| + | |} | ||
| + | |||
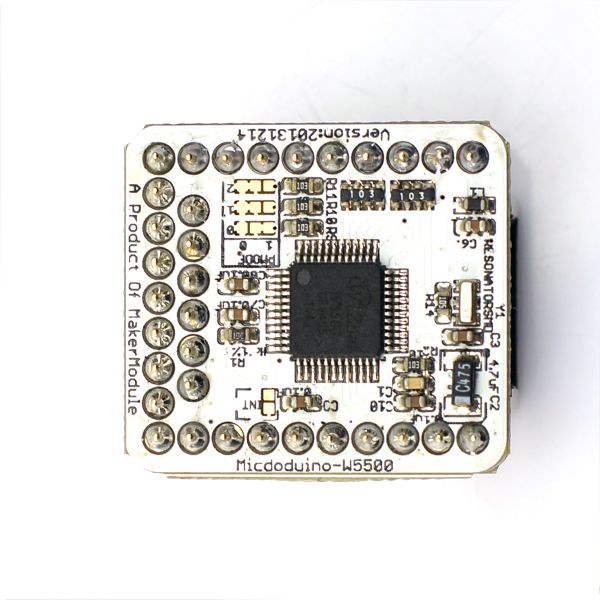
| + | [[file:Micrduino-W5500-pin-1.jpg|800px|thumb|center|Microduino-W5500]] | ||
| + | [[file:Micrduino-W5500-pin-2.jpg|800px|thumb|center|Microduino-W5500]] | ||
==Documents== | ==Documents== | ||
2014年8月22日 (五) 02:38的最新版本
| Language | English |
|---|
|
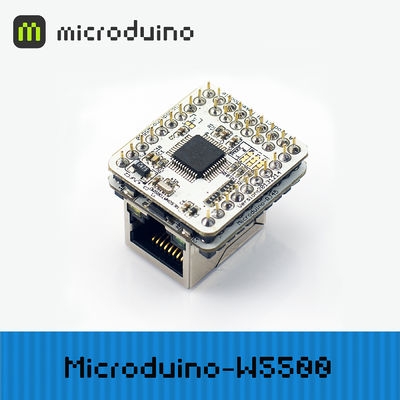
Microduino-W5500 is the Ethernet control module, developed by adopting W5500 network chip. Only when Microduino-W5500 is stacked with Microduino-RJ45 can it form a complete network module. It can not be used individually.
目录[隐藏]Features
Specification
Status Indication
文件:Micrduino-W5500-pin-1.jpg Microduino-W5500 文件:Micrduino-W5500-pin-2.jpg Microduino-W5500 Documents
DevelopmentArduino libraries and support packages: https://github.com/Microduino/Microduino_Tutorials/tree/master/Microduino_Libraries/_02_Microduino_Ethernet_WIZ Widely applied in: Home network device: STB,PVR and digital media adapter? Security system: DVR,IPC and kiosk Factory and building automation systems, medical monitoring equipment and embedded server ApplicationNetworking Microduino core modules via sample programs: Preparation
Step 1:Acquire your IP address
Step 2:Connect Microduino core modules through network and acquire web page information
address, server, time and so on. PurchaseHistoryPictureFrontBackVideo |


