Microduino ENC Network (8)
| Language | English |
|---|
目录ObjectiveThis tutorial will show you how to control two leds with a more stylish webpage thanks to some images Equipment
ImagesFirst, you need to understand what happens when, in a webpage, there are references to external resources (images, javascript…:
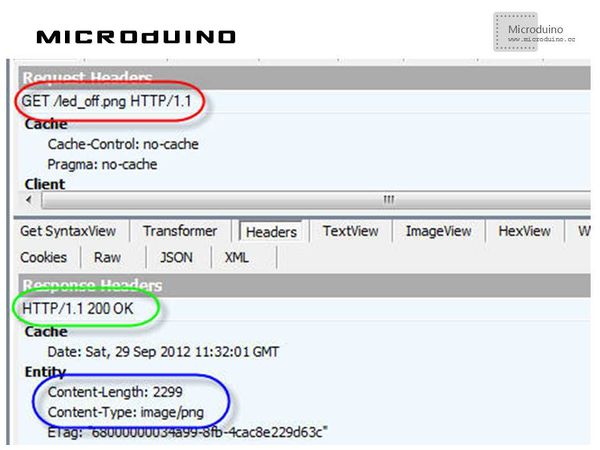
When the web server answers, it tells the browser (in response header) the type of the file it’s sending using the MIME standard. Here’s an example (sniffed using Fiddler) about a PNG image: Microduino’s sketch should be able to:
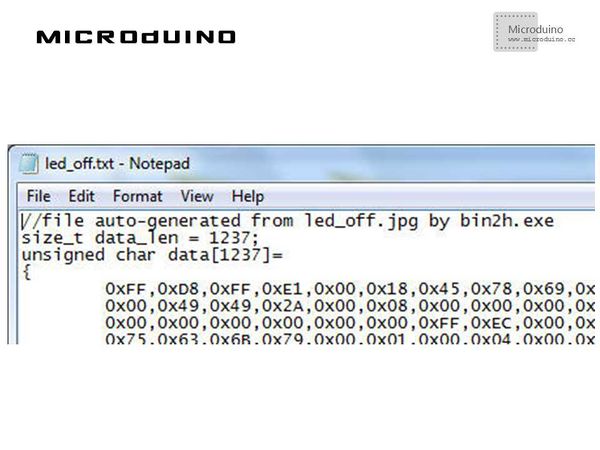
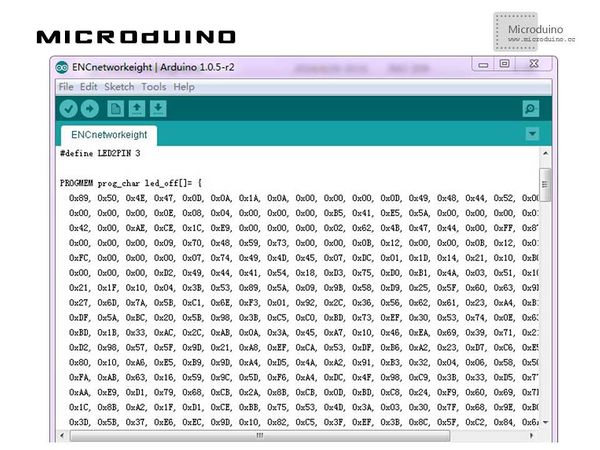
Binary ResourcesImages are binary files: in our simple example we should be able to store them in our sketch, in the form of byte arrays. I found a very useful utility that helps with this conversion: bin2h. Conversion’s result is a text file: To save microcontroller’s RAM memory, we store the images in the program memory using the directive PROGMEM: Schematic
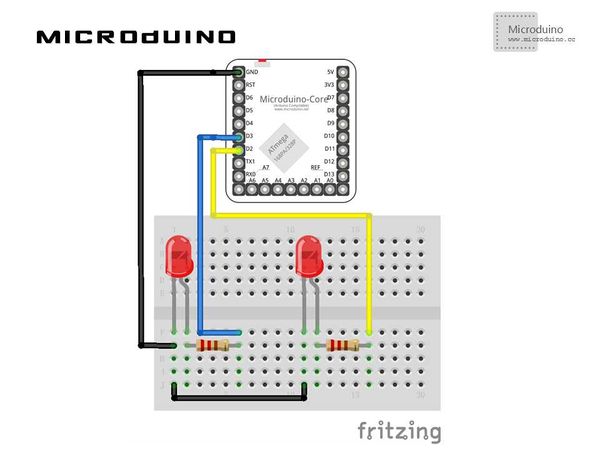
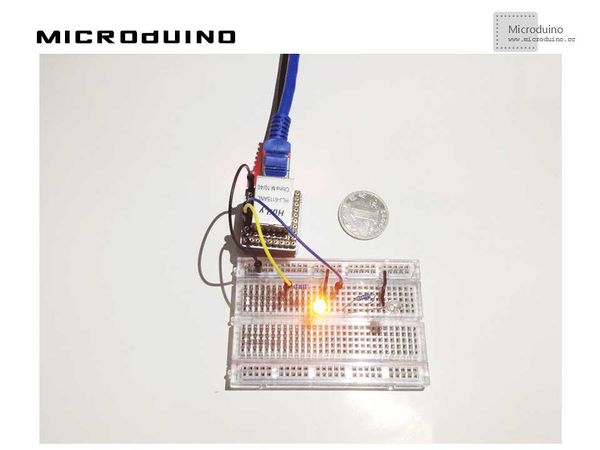
Stack all modules and then connect the ethernet cable, as follows: Programhttps://github.com/Microduino/Microduino_Tutorials/tree/master/Microduino_ENC/ENCnetworkeight DebugStep 1:Download the EtherCard library and copy to your libraries fold of IDE, then restart IDE. https://github.com/jcw/ethercard Step 2:Explain the program: //My sketch parses browser’s request and – if it’s asking for one of the two images – calls the method to send it back to the browser: if(strstr((char *)Ethernet::buffer + pos, "GET /led_off.png") != 0)
send_png_image(led_off, sizeof(led_off));
else if(strstr((char *)Ethernet::buffer + pos, "GET /led_on.png") != 0)
send_png_image(led_on, sizeof(led_on));
//This method prepares the response with the correct header and calls emit_raw_p() method to add image’s bytes to the response; finally it sends the full response back to the browser using httpServerReply method.
 BufferFiller bfill = ether.tcpOffset();
 bfill.emit_p(PSTR("HTTP/1.0 200 OK\r\n"
   "Content-Type: image/png\r\n\r\n"));
 bfill.emit_raw_p(png_image, image_size);
 ether.httpServerReply(bfill.position());
 }
//If, instead, browser’s request contains ?LEDx, led’s status is changed and the html page is created with the correct images depending on leds’ statuses: if(strstr((char *)Ethernet::buffer + pos, "GET /?LED1") != 0) {
led1Status = !led1Status;
digitalWrite(LED1PIN, led1Status);
}
Step 4:Copile the code and download it. Step 5:Use the browser to access the Microduino's IP, then click button, observe the bulb's state. ResultAccess the Microduino's IP address, click the button, browser will request the page and add the ?LEDx suffix: Microduino will change the LED state and the button's color. Video |
