|
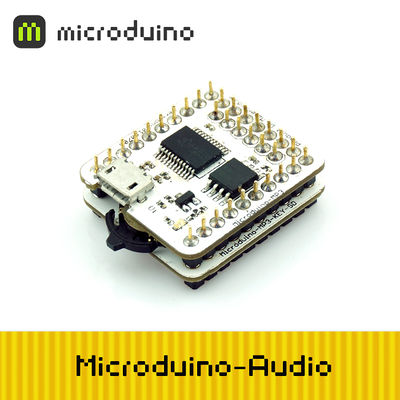
Microduino-Audio is the audio play module based on JQ6500 serial port MP3 chip, which together with Audio-KEY-SD can play flash music by thumbwheel switch control and with Microduino core module can send serial port commands to control the system.
Features
- Adopt serial port control with default serial 1. Serial port can be selected by jumpers: Serial 0, soft serial port(D4, D5)
- Allow external memory card connection and play as well as disk display while connecting with a computer and content update.
- Sleep mode serial port setting and low power consumption.
Specification
- MP3 format:
- Support all bit rate 11172-3 and ISO13813-3 layer3 audio decoding.
- Support sampling rate (KHZ):8/11.025/12/16/22.05/24/32/44.1/48
- Normal, Jazz, Classic, Pop and Rock supportable
- Support asynchronous serial communication mode and receive commands sent from the upper computer by serial port:
- Communication standard: 9600 bps 、
- Data bit:1
- Check bit:none
- Flow control:none
- 24-bit DAC output, 90dB dynamic range and 85dB signal noise ratio supportable.
- Support FAT16 and FAT32 system as well as 32G memory card to the maximum
- With broadcast language insertion function, you can pause the playing background music.
- Audio data is sorted by folders with 100 folders at the most supportable. Each folder can be sorted with 1000 pieces of music.
- 30-level volume adjustable (0x00-0x1E)
Document
JQ6500 sound chip description: 文件:JQ6500.pdf
Development
- Dial wheel button control
- Hardware needed: [Microduino-Core+]], Microduino-USBTTL,Microduino-Amplifier, Microduino-Audio, Audio-KEY-SD, two loudspeakers and power supply (1A or higher) or Microduino Extension Boards (Upin27 Compatible);
- Connect your PC with Microduino-Audio and write audio file into flash, which can refer to document instructure;
- Stack Audio-KEY-SD. Meantime, Microduino-Audio’s microUSB interface is not directly connected with the computer. You need to change another power supply so as not to recognize the driver and fail to play music. Please make sure the current should be 1A or higher, otherwise, it may cause music play failure due to undercurrent. Or you can use microUSB on Microduino extension module to supply power.
- Start Arduino IDE and open example program.
Program description: "arduino.h" is audio control file.
1. Under default serial port, you can select serial port in "arduino.h" based on your core module.
#define AUDIO_PORT Serial1    //Core+
//#define AUDIO_PORT mySerial  //Core
2. Initialize Audio module and you can choose where to start the music.
#define DEVICE_Flash  5
#define DEVICE_TF  1
If you want to play Flash, please initialize: audio_init(DEVICE_Flash,MODE_loopOne,music_vol);
3. Initialize Audio module and choose play mode.
#define MODE_loopAll 0
#define MODE_loopOne 1
#define MODE_One_STOP 2
#define MODE_One_END  4
- Select Microduino Core+ (Atmega644P@16M,5V) as the board cad, download to core board with Microduino-USBTTL after compiling; After the download, dial the wheel left and right, you can choose the music.
- Serial port instructure controls music from memory card.
- Connect Microduino-Audio to your PC with USB cable, you can find two disks including one MP3’s flash and one memory card.
- Open memory and create a folder, which has to be named among the range of 01, 02…………99. Save music into this newly created folder and name the music file among the range of 001, 002,003………999.
- Define the initialization to be music from TF: audio_init(DEVICE_TF,MODE_loopOne,music_vol);
Application
Microduino-Audio is widely used in various kinds of voice broadcast:
- In-car navigation voice broadcast
- Road transport inspection and toll station voice prompts;
- Railway station and bus station security check voice prompts;
- Electric power, communication and financial hall voice prompts;
- Vehicle in-and-out access verifying voice prompts;
- Public security border control channel voice prompts;
- Multi-channel voice alarm or equipment operation guide voice;
- Electric tour car safe driving voice notices;
Purchase
History
Picture
Front
Back
Video
|
