“Sensor-LED/zh”的版本间的差异
502748957@qq.com(讨论 | 贡献) |
502748957@qq.com(讨论 | 贡献) |
||
| (未显示3个用户的7个中间版本) | |||
| 第3行: | 第3行: | ||
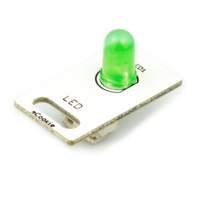
|[[File: Microduino-LED-rect-v1.jpg|300px|left]] || | |[[File: Microduino-LED-rect-v1.jpg|300px|left]] || | ||
::<p style="color: #000000;font-size:200%"><br><br><br><br><br>'''Sensor-LED'''</p> | ::<p style="color: #000000;font-size:200%"><br><br><br><br><br>'''Sensor-LED'''</p> | ||
| − | ::产品编号:'''<big style="color: #00A0A6"> | + | ::产品编号:'''<big style="color: #00A0A6">MSLT63</big>''' |
|- | |- | ||
|[[File: Add-to-cart.jpg|300px|left|link=https://shop108263663.taobao.com/?spm=a230r.7195193.1997079397.2.ek3cAW]]|| | |[[File: Add-to-cart.jpg|300px|left|link=https://shop108263663.taobao.com/?spm=a230r.7195193.1997079397.2.ek3cAW]]|| | ||
| 第34行: | 第34行: | ||
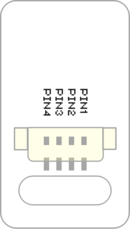
**PIN1:GND | **PIN1:GND | ||
**PIN2:VCC | **PIN2:VCC | ||
| − | ** | + | **PIN3:数字信号输出 |
**PIN4:NC(空) | **PIN4:NC(空) | ||
|width="35%" valign="top" align="center"| | |width="35%" valign="top" align="center"| | ||
| 第57行: | 第57行: | ||
} | } | ||
void loop() { | void loop() { | ||
| − | digitalWrite( | + | digitalWrite(LED , HIGH); //亮灯 |
delay(500); | delay(500); | ||
| − | digitalWrite( | + | digitalWrite(LED , LOW); //灭灯 |
delay(500); | delay(500); | ||
| + | } | ||
| + | </source> | ||
| + | *该例程效果为:调节亮度实现LED灯呼吸效果 | ||
| + | **核心Core只能用3,5,6,9,10,11引脚 | ||
| + | **核心Core+只能用7,8,9,10,12,13引脚 | ||
| + | **核心CoreUSB只能用SCL,3,4,5,6,7,8,9引脚 | ||
| + | **核心CoreRF只能用4,5,6,7,8,9,10引脚 | ||
| + | <source lang="cpp"> | ||
| + | #define LED 3 //定义LED引脚 | ||
| + | |||
| + | void setup() { | ||
| + | pinMode(LED, OUTPUT); | ||
| + | } | ||
| + | void loop() { | ||
| + | //逐渐变亮 | ||
| + | for (int8_t i = 0; i < 255; i++) { | ||
| + | analogWrite(LED, i); | ||
| + | delay(5); | ||
| + | } | ||
| + | //逐渐变暗 | ||
| + | for (int8_t i = 255; i > 0; i--) { | ||
| + | analogWrite(LED, i); | ||
| + | delay(5); | ||
| + | } | ||
} | } | ||
</source> | </source> | ||
| 第67行: | 第91行: | ||
<br> | <br> | ||
<p style="color: #333333;font-size:135%">'''文档'''</p> | <p style="color: #333333;font-size:135%">'''文档'''</p> | ||
| − | * | + | * |
<br> | <br> | ||
---- | ---- | ||
| 第76行: | 第100行: | ||
<br> | <br> | ||
<p style="color: #333333;font-size:155%">'''示例教程'''</p> | <p style="color: #333333;font-size:155%">'''示例教程'''</p> | ||
| − | [[单色LED灯]] | + | *<big>[[单色LED灯]]</big> |
<br> | <br> | ||
---- | ---- | ||
| 第92行: | 第116行: | ||
|- | |- | ||
|width="50%" valign="top" align="left"| | |width="50%" valign="top" align="left"| | ||
| − | [[file: Microduino-LED-F.JPG|thumb|400px|center|Sensor- | + | [[file: Microduino-LED-F.JPG|thumb|400px|center|Sensor-LED Front]] |
|width="50%" valign="top" align="left"| | |width="50%" valign="top" align="left"| | ||
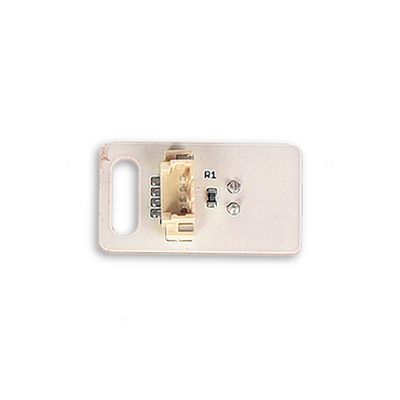
| − | [[file: Microduino-LED-b.JPG|thumb|400px|center|Sensor- | + | [[file: Microduino-LED-b.JPG|thumb|400px|center|Sensor-LED Back]] |
|} | |} | ||
|} | |} | ||
| + | <p style="font-size:150%">[[MCookie 传感器系列|返回Sensor界面]]</p> | ||
| + | <br> | ||
| + | <br> | ||
2018年12月13日 (四) 10:38的最新版本
| |
|
|
技术规格
引脚
编程手册 您可以通过Getting Started了解使用Arduino IDE编程控制模块。
#define LED 8 //定义LED引脚

void setup() {
  pinMode(LED,OUTPUT);
}
void loop() {
    digitalWrite(LED , HIGH);    //亮灯
    delay(500);
    digitalWrite(LED , LOW);   //灭灯
    delay(500);
}
#define LED 3 //定义LED引脚

void setup() {
  pinMode(LED, OUTPUT);
}
void loop() {
  //逐渐变亮
  for (int8_t i = 0; i < 255; i++) {
    analogWrite(LED, i);
    delay(5);
  }
  //逐渐变暗
  for (int8_t i = 255; i > 0; i--) {
    analogWrite(LED, i);
    delay(5);
  }
}
文档
注意事项
示例教程
Q&A
历史
图库 |


