“获取网络时间”的版本间的差异
(→调试) |
|||
| (未显示同一用户的2个中间版本) | |||
| 第8行: | 第8行: | ||
==设备== | ==设备== | ||
| − | *'''[[Microduino-Core]]''' | + | *'''[[Microduino-Core/zh]]''' |
| − | *'''[[Microduino- | + | *'''[[Microduino-USBTTL/zh]]''' |
| − | *'''[[Microduino-ENC28J60]]''' | + | *'''[[Microduino-ENC28J60/zh]]''' |
| − | *'''[[Microduino-RJ45]]''' | + | *'''[[Microduino-RJ45/zh]]''' |
*其他硬件设备 | *其他硬件设备 | ||
| − | **USB数据连接线 一根 | + | **USB数据连接线 一根 |
==原理图== | ==原理图== | ||
| 第22行: | 第22行: | ||
==程序== | ==程序== | ||
| − | https://github.com/Microduino/Microduino_Tutorials/tree/master/Microduino_Processing/MicroduinnoNetTime | + | [https://github.com/Microduino/Microduino_Tutorials/tree/master/Microduino_Processing/MicroduinnoNetTime MicroduinnoNetTime] |
| − | https://github.com/Microduino/Microduino_Tutorials/tree/master/Microduino_Processing/ProcessingNetTime | + | [https://github.com/Microduino/Microduino_Tutorials/tree/master/Microduino_Processing/ProcessingNetTime ProcessingNetTime] |
==调试== | ==调试== | ||
| 第33行: | 第33行: | ||
硬件搭建部分有些类似于Microduino_ENC网络(十二)的 用NTP获取Internet时间: | 硬件搭建部分有些类似于Microduino_ENC网络(十二)的 用NTP获取Internet时间: | ||
| − | + | [[Microduino ENC网络(十二)————用NTP获取Internet时间/zh]] | |
2014年10月29日 (三) 07:32的最新版本
| Language | English |
|---|
目的本教程将教大家如何用processing来显示Microduino获取的网络时间。 设备
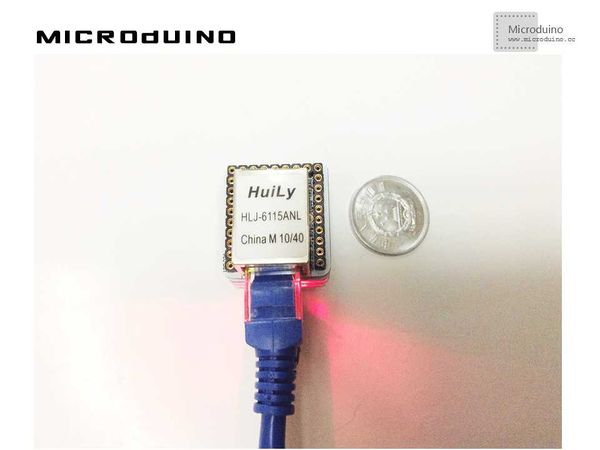
原理图堆叠设备说明中的四个Microduino模块即可 程序调试步骤一:按着原理图搭建硬件环境,像这样:
本例需要两端的代码,Processing端和Microduino端 Microduino: 在互联网上有很多时间服务器:比如美国的 NIST (National Institute of Standards and Technology) 提供整个互联网的时间服务;这里有一个意大利的 INRiM (Istituto Nazionale di Ricerca Metereologica)提供的时间服务器: static byte ntpServer[] = {193,204,114,232};
在EtherCard库针对NTP请求有两个方法:
srcPort参数是用来在众多的enc28J60模块接收的包中发现一个包含NTP服务器回应的数据包:你可以自己选择这个值,但是ntpRequest方法和ntpProcessAnswer方法中这个参数应该一致。 取得时间戳的值后,你必须转换成date-time格式。这个方法过程如下:
几个容易弄错的地方: 可能是闰年:如果是闰年必须用366*86500秒替代365*86500秒,判断是否为闰年可以用下面的方法: boolean isLeapYear(unsigned int year) {
return (year % 4 == 0 && (year % 100 != 0 || year % 400 == 0));
}
每个月份的天数是变化的:把这些值存入一个数组,格式如下: static int days_in_month[] = {31, 28, 31, 30, 31, 30, 31, 31, 30, 31, 30, 31};
如果是闰年,二月份为29天: if(isLeapYear(year) && month == 1) seconds = SECONDS_IN_DAY * 29; 最后,时间戳是参考的GMT(格林尼治标准时间),如果你居住在不同的时区,你必须修正这个值: #define TIME_ZONE +1 [...] printDate(timeStamp + 3600 * TIME_ZONE);
Processing: //得到第一个串口的数据,并定义如果有换行就缓存 println(Serial.list());
// is always my Arduino, so I open Serial.list()[0].
// Open whatever port is the one you're using.
myPort = new Serial(this, Serial.list()[0], 9600);
myPort.bufferUntil('\n'); // Trigger a SerialEvent on new line
 //read port data
 String val = myPort.readStringUntil('\n');
 if (val != null) {
   val = trim(val);
   println(val);
   if (val.startsWith("time:")) {
     //if some exception happend, initial time is 0 colock
     try {
       timeShow=val.substring(5,13);
     }
     catch (NumberFormatException e) {
       println("error:"+val);
     }
     //Display Text
     text ( timeShow, 90, 120);
   }
 }
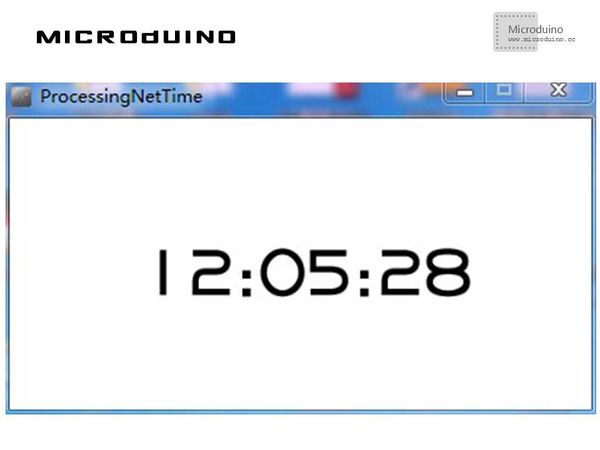
步骤三:下载代码并编译通过。 步骤四:运行后,看看processing中会出现什么。 结果屏幕上会显示一个网络时间
视频 |

