“【识别标签ID】”的版本间的差异
502748957@qq.com(讨论 | 贡献) (创建页面,内容为“{| style="width: 800px;" |- | 1)所需硬件:Microduino-Core/zh,Microduino-USBTTL/zh或Microduino-USBTTL-C/zh,Microduino-Module NFC/zh(带天线)…”) |
502748957@qq.com(讨论 | 贡献) |
||
| 第2行: | 第2行: | ||
|- | |- | ||
| | | | ||
| − | + | *1)所需硬件:【[[Microduino-Core/zh]]】,【[[Microduino-USBTTL/zh]]】或【[[Microduino-USBTTL-C/zh]]】,【[[Microduino-Module NFC/zh]]】(带天线) | |
| + | *2)所需软件:Microduino IDE 1.6.7或以上版本。下载如下程序到核心模块Core中(复制粘贴到IDE中,直接下载,或在文件→示例→NFC中选择一个示例) | ||
<source lang="cpp"> | <source lang="cpp"> | ||
#include <Microduino_NFC.h> | #include <Microduino_NFC.h> | ||
| 第61行: | 第62行: | ||
} | } | ||
</source> | </source> | ||
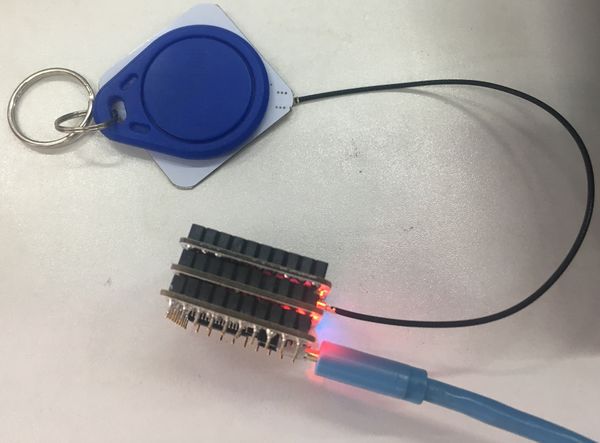
| − | + | *3)确认天线已经连接好,如图所示。并且将标签放好,贴紧天线。 | |
| − | + | [[file:NFC example1-2.JPG|thumb|center|600px]] | |
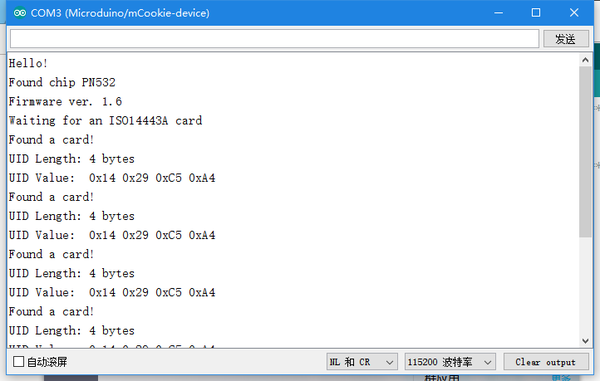
| − | + | *4)下载成功后打开串口监视器,波特率选择115200. | |
| − | + | [[file:NFC example1.png|center|600px|thumb]] | |
| − | + | *5)可以通过串口观察到返回信息,可以看到标签的UID与UID长度。 | |
| − | + | 到这一步就可以简单的形成一个NFC标签控制应用的基础了,通过识别正确的UID执行对应功能。 | |
| − | |||
| − | |||
*'''[[Microduino-Module NFC/zh | 返回Microduino-NFC模块页面]]''' | *'''[[Microduino-Module NFC/zh | 返回Microduino-NFC模块页面]]''' | ||
|} | |} | ||
2018年6月20日 (三) 09:12的版本
#include <Microduino_NFC.h>

NFC nfc;

void setup(void) {
  Serial.begin(115200);
  Serial.println("Hello!");

  uint32_t versiondata = nfc.begin();

  if (! versiondata) {
    Serial.print("Didn't find PN53x board");
    while (1); // halt
  }

  // Got ok data, print it out!
  Serial.print("Found chip PN5"); Serial.println((versiondata>>24) & 0xFF, HEX);
  Serial.print("Firmware ver. "); Serial.print((versiondata>>16) & 0xFF, DEC);
  Serial.print('.'); Serial.println((versiondata>>8) & 0xFF, DEC);

  // Set the max number of retry attempts to read from a card
  // This prevents us from waiting forever for a card, which is
  // the default behaviour of the PN532.
  nfc.setPassiveActivationRetries(0xFF);

  Serial.println("Waiting for an ISO14443A card");
}

void loop(void) {
  boolean success;
  uint8_t uid[] = { 0, 0, 0, 0, 0, 0, 0 };  // Buffer to store the returned UID
  uint8_t uidLength;                        // Length of the UID (4 or 7 bytes depending on ISO14443A card type)

  // Wait for an ISO14443A type cards (Mifare, etc.).  When one is found
  // 'uid' will be populated with the UID, and uidLength will indicate
  // if the uid is 4 bytes (Mifare Classic) or 7 bytes (Mifare Ultralight)
  success = nfc.readPassiveTargetID(PN532_MIFARE_ISO14443A, uid, &uidLength);

  if (success) {
    Serial.println("Found a card!");
    Serial.print("UID Length: ");Serial.print(uidLength, DEC);Serial.println(" bytes");
    Serial.print("UID Value: ");
    for (uint8_t i=0; i < uidLength; i++)
    {
      Serial.print(" 0x");Serial.print(uid[i], HEX);
    }
    Serial.println("");
    // Wait 1 second before continuing
    delay(1000);
  }
  else
  {
    // PN532 probably timed out waiting for a card
    Serial.println("Timed out waiting for a card");
  }
}
到这一步就可以简单的形成一个NFC标签控制应用的基础了,通过识别正确的UID执行对应功能。
|

