Bluetooth Night Light

来自Microduino Wikipedia
1304410487@qq.com讨论 | 贡献2015年8月11日 (二) 08:13的版本 (Created page with "{{Language| Bluetooth Night Light }} {| style="width: 800px;" |- | ==Purpose== When ambient light becomes dark, the night light turns on automatically. Using Bluetooth to acce...")
(差异) ←上一版本 | 最后版本 (差异) | 下一版本→ (差异)
跳转至: 导航搜索
Language English

Purpose

When ambient light becomes dark, the night light turns on automatically. Using Bluetooth to access the light, you can control the color.

Principle

Equipment

Module Number Function
Microduino-CoreUSB 1 Core board
Microduino-Sensorhub 1 Sensor pinboard
Microduino-BT 1 Bluetooth module
Microduino-Light 1 Photosensitive sensor
Microduino-Lantern 1 Colored light
Microduino-BM 1 Battery management

Document

Android Clinet: Note: The new 4.0 version BT needs to be supported by Android version 4.3 and higher. Here we offer Android APP.

APP download:'文件:Microduino-LAMP-APP.zip

Hardware Buildup

  • Setup 1:Stack CoreUSB, BT and Sensorhub.
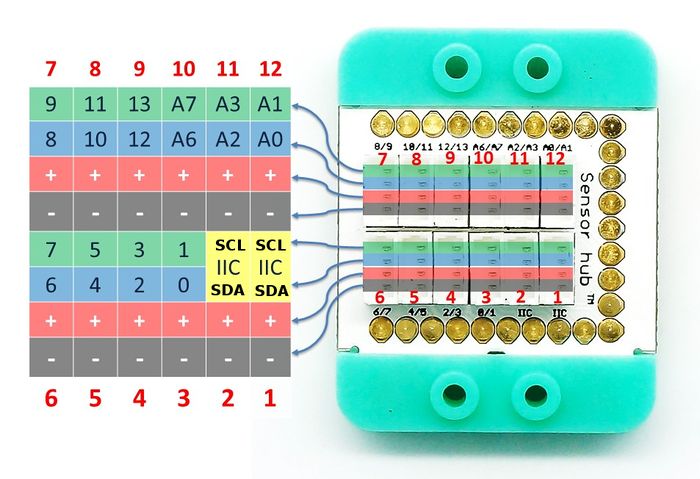
  • Setup 2:Connect the lantern to Sensorhub’s D6 pin and photosensitive sensor to A0.
MCookie-sensorhub rule.JPG

Software Debugging

  • Setup 1:Build IDE, connect CoreUSB to your PC and download program code.

ble_led_light

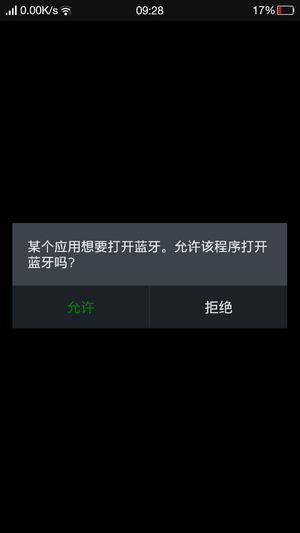
  • Setup 2:Download Android client, and then decompress, install and open it. It will remind you to open Bluetooth device if you don’t open Bluetooth.
Microduino BT Serial 1.png
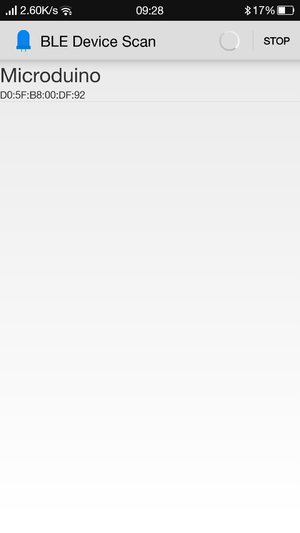
  • Setup 3:Click SCAN on top right, select Microduino and connect.
Microduino BT Serial 2.png
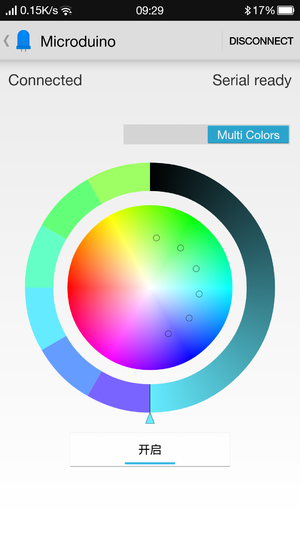
  • Setup 4:You’ll see Serial Present on top right in default and when it turns to Seerial Ready, you can have normal communication.
Microduino BT Serial 3.png
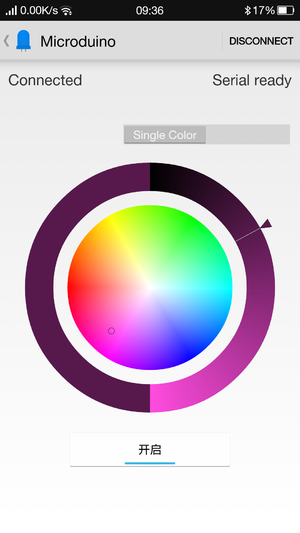
  • APP description:
    • If you have multiple colored lights, you can switch to Multi Color mode to adjust. You can connect six lights to the most. For Single Color mode, no matter how many lights you connect, it shows the same color.
    • You can adjust the brightness via the circular ring.
    • and control the light via the bottom switch.
Microduino BT Serial 5.png

Code description:

  • Choose to adopt Bluetooth control when it is connected.

The use of BT serial port needs to be choosed accoding to wire jumpers oon the board. The default serial port is 0:Serial. “ble()”function is for Bluetooth recieving data and lantern controlling.

  • Ambient light pre-set value—by changing the light value, you can choose under which brightness can turn on the light.
#define Light    100
  • Read brightness function
ightValue = analogRead(Light_PIN);
  • Under the circumstance of no Bluetooth connection, the lantern will turn on when the ambient light brightness is less than the pre-set value otherwise it will turn off.
if (!color_en && lightValue < Light)
  {
    rainbowCycle(10, 255, 0, 0, 0);
    rainbowCycle(10, 255, 0, 0, 1);

    rainbowCycle(10, 0, 255, 0, 0);
    rainbowCycle(10, 0, 255, 0, 1);

    rainbowCycle(10, 0, 0, 255, 0);
    rainbowCycle(10, 0, 0, 255, 1);

    rainbowCycle(10, 255, 0, 225, 0);
    rainbowCycle(10, 255, 0, 225, 1);

    rainbowCycle(10, 247, 139, 5, 0);
    rainbowCycle(10, 247, 139, 5, 1);

    rainbowCycle(10, 255, 255, 0, 0);
    rainbowCycle(10, 255, 255, 0, 1);

    rainbowCycle(10, 0, 255, 255, 0);
    rainbowCycle(10, 0, 255, 255, 1);

    for (int i = 0; i < 3; i++)
      rainbow(30);
  }
  else if (!color_en)
    colorSet(strip.Color(0, 0, 0));

Result

When there is Bluetooth connection, the lantern is controlled via the Bluetooth. While no Bluetooth connection, the lantern will go on when the ambient light brightness is less than the pre-set light value otherwise, it will go off. You can use LEGO to stack with our mCookie sensor to build a beautiful frame.

Video