|
Step 1: Arduino IDE Download and Installation
*Arduino compatible, first install the basic IDE
Download the Microduino IDE (based on a modified version ArduinoIDE):
- We have Microduino compatible hardware support packages and libraries integrated in the IDE. The next step will be to verify that it is installed correctly
Step 2: Verify IDE
|
*Verifying hardware support package
- The Microduino IDE has an integrated hardware support package for all cores availables:
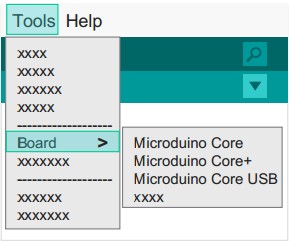
- This package allows Microduino hardware to be displayed in the “Board” menu
- Like the official Arduino hardware, you can download other codes and reprogram the bootloader
1. Start Arduino IDE, click the "Tools" menu.
2. Verify that there are Microduino modules under "Board" menu.
|
|
|
*Verify library
- Microduino provides a compatible library support package for dozens of different functional modules:
- The original Arduino support packages are renamed for simpler classification
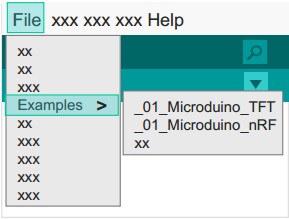
1. Start Arduino IDE, click the "File" menu.
2. You will find the prewritten programs in the "Examples" menu.
ATTENTION: When using version 1.6.3 of the IDE, in order to show the Libraries contents you have to first choose the correct core at the "board" menu.
|
|
Step 3: Installing Drivers
*After the IDE is configured, install the drivers
*Download drivers
- First, download the drivers according to your operational system:
- Windows:Windows - 64 bits Windows - 32 bits
- Mac: no drivers need to be downloaded, as soon as the module is connected, a prompt for installation with show up on your computer screen.
*Install drivers
Step 4: Connection Hardware
- Use a micro-USB to connect the mCookie-CoreUSB to your PC/Mac;
|
*Windows
- Open the IDE,go to "Tools" > "Serial Port"
- Select "COMXX"
|
|
|
*Mac OS
- Open the IDE,go to "Tools" > "Serial Port"
- Select"dev/tty.usbmodemXX"
|
|
Appendix
|

