|
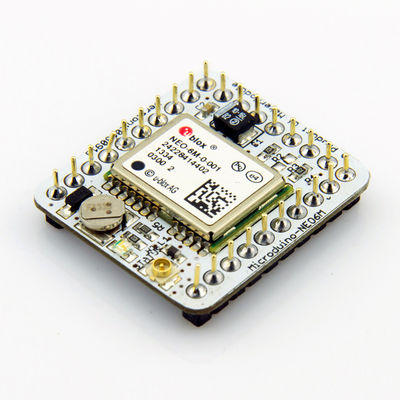
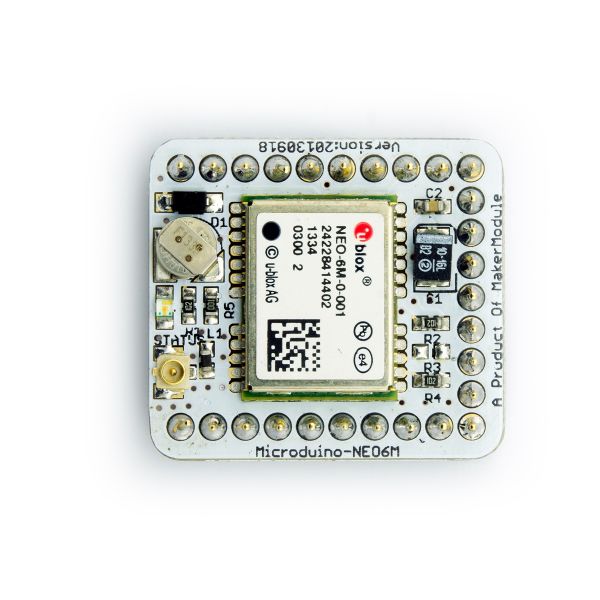
Microduino-NEO module maybe the most beautiful GPS module that you've seen. Its core module use UBLOX NEO-6M, high sensitivity, update rate up to 5Hz, using mini ceramic antenna with IPEX interface, and build-in a rechargeable battery backup.
|
Specifications
- Communication protocol:
- Microduino NEO-6M module use NMEA-0183 protocol and output GPS data, using the UBX protocol to configure the module.
- Reception characteristics
- 50 channels,GPS L1(1575.42Mhz) C/A 码,SBAS:WAAS/EGNOS/MSAS
- Capture tracking sensitivity:-161dBm
- Capture time
- cold start:27S(Fastest time)
- warm start:27S
- hot start:1S
- Note:
- Cold start means that module stored history information which GPS receiver has lost (corresponding to the main power supply and battery both lost power), then restart the module, called cold start.
- Warm start means that the is the module saved the historical information, but this information is inconsistent with information of currently visible satellites, and under such conditions to start module, called warm start.
- Hot start means that module stored GPS history information which consistent with the currently visible satellite's information, then restart the module, called a hot start.
- Interface characteristics
- TTL,compatible 3.3V/5V microcontroller system
- Serial communication baud rate:
- Microduino NEO-6M module supports several baud rate:4800、9600、38400(defult)、57600;
- Set the baud rate by two resistors (R3,R4,recommend value is 1k):
| R3 |
R4 |
Protocol |
Baud rate
|
| No welding |
No welding |
NMEA |
9600
|
| No welding |
welding |
NMEA |
38400
|
| welding |
No welding |
NMEA |
4800
|
| welding |
welding |
UBX |
57600
|
Pin Description
| NEO-6M Module Pin |
Microduino Pin |
Function
|
| TX |
RX0(or D2) |
Module serial send pin (TTL level), connect to microcontroller's RXD
|
| RX |
TX1(or D3) |
Module serial receive pin (TTL level), connect to microcontroller's MCU TXD
|
Document
Eagle PCB 文件:Microduino-NEO6M.zip
Main components
Development
- Make sure the +3.3 v power supply current can reach 200ma, not recommended use FT232R debugging directly, because FT232R's output +3.3 v current is too small.
Arduino library and supported package
- Microduino NEO-6M use RX0,TX1 to comu模块默认与Core的串口通讯引脚是RX0、TX1,因此不可直接与Microduino FT232R叠加
PC上位机调试时
- 需要直接通过串口调试时:
- 不直接叠加FT232,应该将FT232与NEO-6M二者的RX0、TX1交叉连接。
用FT232R、Core下载、调试程序时
- 若保持默认跳线(RX0、TX1):
- 下载程序时请拔下Microduino NEO-6M模块;
- 玩家自己改动模块背面的跳线:切断两组的焊盘中间与RX0/TX1的连线,将焊盘中间与D2、D3焊上即可。
- 若采用了改跳线的方法,可将Microduino NEO-6M与Core的串口连接由TX-RX0、RX-TX1改成:TX-D2、RX-D3(相对Core+的Serial1)
PPS状态指示灯
- 该指示灯连接在 UBLOX NEO-6M 模组的TIMEPULSE 端口,该端口的输出特性可以通过程序设置;
- PPS指示灯,在默认条件下(没经过程序设置),有 2 个状态:
- 常亮,表示模块已开始工作,但还未实现定位;
- 闪烁(100ms 灭,900ms 亮),表示模块已经定位成功。
- 通过 PPS指示灯,可以很方便的判断模块的当前状态,方便使用。
连接方式
- 如果采用Microduino FT232R调试,不可直接叠加,因为FT232与NEO-6M的串口RX、TX管脚定义一致,而正常的串口通信应该TX与RX交叉相连;
- 模块与单片机连接最少只需要 4 根线即可:
- VCC 和 GND用于给模块供电,模块 TXD 和 RXD 则连接单片机的 RXD 和 TXD。
- (附:这里特别注意,模块的 TXD 和 RXD 脚不能直接连接到电脑的 RS232 串口上,必须经过电平转换芯片(MAX232 之类的),做电平转换后,才能与之连接)
应用
程序下载
测试程序:文件:Program Test NEO-6M.zip
测试Microduino NEO-6M模块
- 所需要准备的硬件有:Microduino FT232R、Microduino Core、Microduino OLED、Microduino NEO-6M;
- 所需要准备的软件有:Arduino IDE(1.0版本以上)、Adafruit_GPS库、Microduino提供的测试程序(Arduino端);
- 所需要准备的环境有:空阔地带,请勿在室内测试。
- 将下载好的库文件夹放入Arduino IDE安装文件夹内的libraries中;
- 启动Arduino IED,打开Microduino提供的测试程序,板卡选择Microduino Core (Atmega328P@16M,5V),直接下载即可;
- 下载完毕后可观察OLED:
- 半分钟左右,日期、时间将会先显示出来;
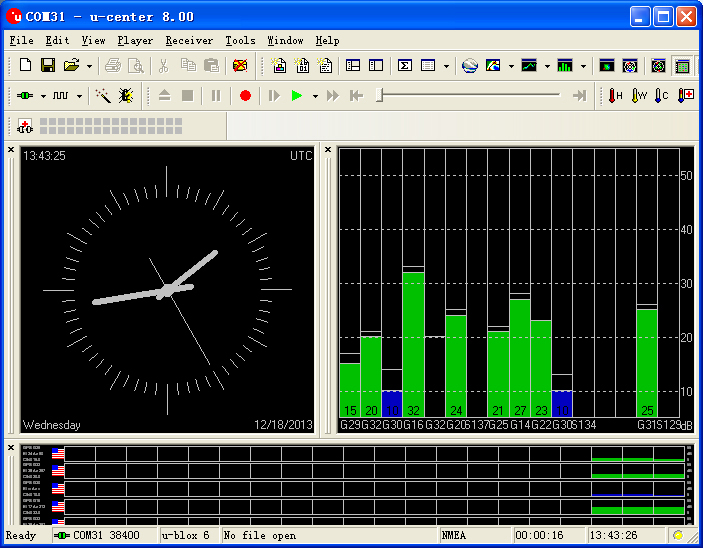
- 继续等待,当你看到Microduino NEO-6M的PPS指示灯闪烁时,速度、经纬度指标都因该能显示出来,如果没有,请重启Microduino Core。
库的使用事项
- 针对Adafruit_GPS库:
- 请确认void setup()中GPS模块波特率为38400,即:GPS.begin(38400);
- 如果您未曾改动过模块背面的跳线:
- 下载程序时请拔下Microduino NEO-6M模块;
- 使用Core或者Core+调试时,需要确定程序有如下定义:Adafruit_GPS GPS(&Serial);
- 如果您改动过模块背面的跳线:
- 使用Core+调试时,需要确定程序有如下定义:Adafruit_GPS GPS(&Serial1);
- 使用Core调试时,需要确定程序有如下定义:SoftwareSerial mySerial(3, 2);、Adafruit_GPS GPS(&mySerial);
用u-center配置模块更新速率
- 首先我们将 Microduino NEO-6M置于空阔的地方,并且通过Microduino FT232R连接到电脑;
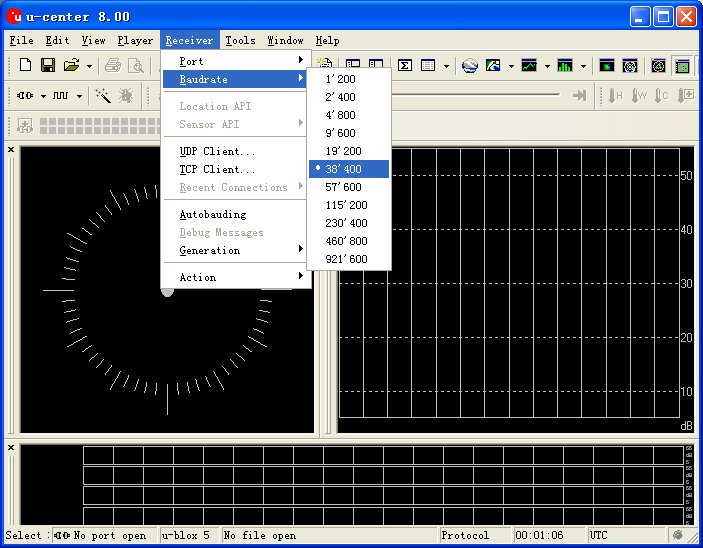
- 打开 u-center 软件
- 先设置波特率:菜单:“Receiver”-“Baudrate”-“38400”;
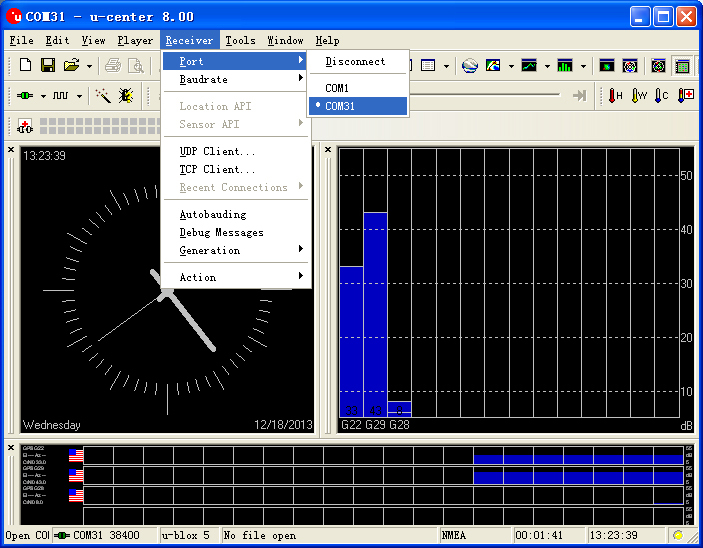
- 再打开相应串口开始通信:菜单:“Receiver”-“Port”-选中Microduino FT232R所对应的串口。
- 更新速率的配置
- 打开菜单:“View”-“Messages View”,调出Messages窗口;
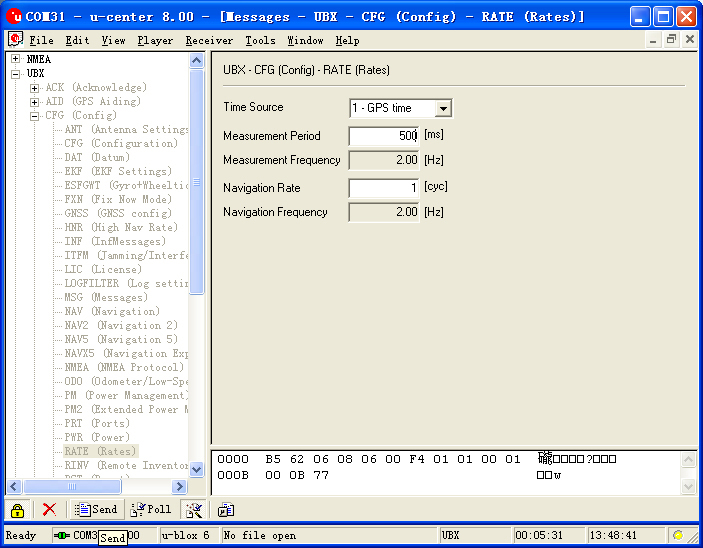
- 打开“UBX”-“CFG(Config)”-“RATE(Rates)”,假设你需要2HZ的更新速率,只要将 Measurement Period设置为500ms;
- 配置完成后,点击窗口左下角Send按钮,就可将配置发往Microduino NEO-6M模块;可看到其他信息窗口的数据更新速度变快了,说明设置成功。
Pictures
|
