Somatosensory interaction - Potentiometer
ObjectiveThis tutorial will teach you how to use the potentiometer to control Processing, then to control the movement of smile face on screen. Equipment
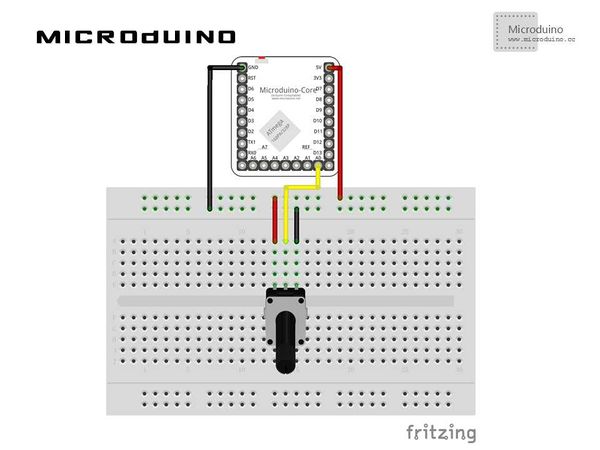
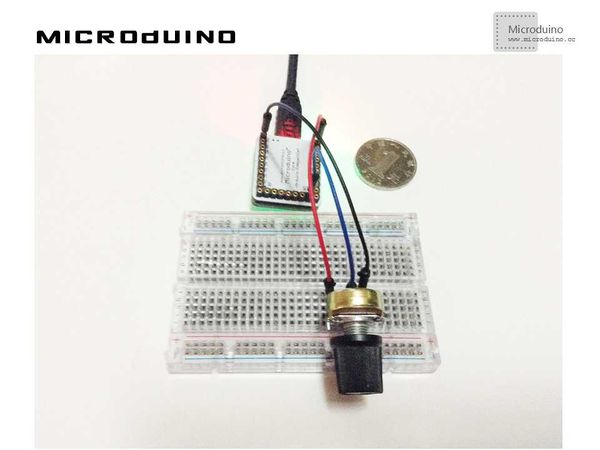
SchematicProgramDebugStep 1:Set up hardware system, as follows: Step 2:Explain the code: //Read potentiometer's simulation value, and assign values to the smiling face of the x coordinate values void draw() {
sensorValue = arduino.analogRead(potPin); //Reading the value of the potentiometer
background(255);
image(face,sensorValue,80);
}
Step 3: Compile the code and download it. Step 4: After running, a smile face will display on the left side, rotate the potentiometer and then observe the smile face's change. ResultThe smiling face on the screen will move around with the potentiometer's rotation, as follows: Video |


