MicroMV 巡线机器人
Radiumray9@gmail.com(讨论 | 贡献)2018年5月16日 (三) 07:16的版本 (创建页面,内容为“=='''基本原理'''== *MicroMV捕捉线并计算出需要旋转的角度,通过串口发送给microduino *microduino接收数据后控制舵机电机 =='''MicroM…”)
基本原理
- MicroMV捕捉线并计算出需要旋转的角度,通过串口发送给microduino
- microduino接收数据后控制舵机电机
MicroMV的代码准备
把lineFollowing.py替换到MicroMV生成的U盘空间中的main.py做为主程序
lineFollowing.py:
import sensor, image, time, math, lcd
from pyb import UART
import json
# Tracks a black line. Use [(128, 255)] for a tracking a white line.
# GRAYSCALE_THRESHOLD = [(0, 64)]
GRAYSCALE_THRESHOLD = [(0, 50)]
#设置阈值,如果是黑线,GRAYSCALE_THRESHOLD = [(0, 64)];
#如果是白线,GRAYSCALE_THRESHOLD = [(128,255)]
# Each roi is (x, y, w, h). The line detection algorithm will try to find the
# centroid of the largest blob in each roi. The x position of the centroids
# will then be averaged with different weights where the most weight is assigned
# to the roi near the bottom of the image and less to the next roi and so on.
ROIS = [ # [ROI, weight]
        (0, 100, 160, 20, 0.7), # You'll need to tweak the weights for you app
        (0, 050, 160, 20, 0.3), # depending on how your robot is setup.
        (0, 000, 160, 20, 0.1)
       ]
#roi代表三个取样区域,(x,y,w,h,weight),代表左上顶点(x,y)宽高分别为w和h的矩形,
#weight为当前矩形的权值。注意本例程采用的QQVGA图像大小为160x120,roi即把图像横分成三个矩形。
#三个矩形的阈值要根据实际情况进行调整,离机器人视野最近的矩形权值要最大,
#如上图的最下方的矩形,即(0, 100, 160, 20, 0.7)
# Compute the weight divisor (we're computing this so you don't have to make weights add to 1).
weight_sum = 0 #权值和初始化
for r in ROIS: weight_sum += r[4] # r[4] is the roi weight.
#计算权值和。遍历上面的三个矩形,r[4]即每个矩形的权值。
# Camera setup...
sensor.reset() # Initialize the camera sensor.
sensor.set_pixformat(sensor.GRAYSCALE) # use grayscale.
sensor.set_framesize(sensor.QQVGA) # use QQVGA for speed.
sensor.skip_frames(30) # Let new settings take affect.
sensor.set_auto_gain(False) # must be turned off for color tracking
sensor.set_auto_whitebal(False) # must be turned off for color tracking
#关闭白平衡
clock = time.clock() # Tracks FPS.
lcd.init() # Initialize the lcd screen.
uart = UART(4, 115200)
uart.init(115200, bits=8, parity=None, stop=1) # init with given parameters
while(True):
    clock.tick() # Track elapsed milliseconds between snapshots().
    img = sensor.snapshot() # Take a picture and return the image.
    centroid_sum = 0
    #利用颜色识别分别寻找三个矩形区域内的线段
    for r in ROIS:
        blobs = img.find_blobs(GRAYSCALE_THRESHOLD, roi=r[0:4], merge=True)
        # r[0:4] is roi tuple.
        #找到视野中的线,merge=true,将找到的图像区域合并成一个
        #目标区域找到直线
        if blobs:
            # Find the index of the blob with the most pixels.
            most_pixels = 0
            largest_blob = 0
            for i in range(len(blobs)):
            #目标区域找到的颜色块(线段块)可能不止一个,找到最大的一个,作为本区域内的目标直线
                if blobs[i].pixels() > most_pixels:
                    most_pixels = blobs[i].pixels()
                    #merged_blobs[i][4]是这个颜色块的像素总数,如果此颜色块像素总数大于                     #most_pixels,则把本区域作为像素总数最大的颜色块。更新most_pixels和largest_blob
                    largest_blob = i
            # Draw a rect around the blob.
            img.draw_rectangle(blobs[largest_blob].rect())
            #将此区域的像素数最大的颜色块画矩形和十字形标记出来
            img.draw_cross(blobs[largest_blob].cx(),
                           blobs[largest_blob].cy())
            centroid_sum += blobs[largest_blob].cx() * r[4] # r[4] is the roi weight.
            #计算centroid_sum,centroid_sum等于每个区域的最大颜色块的中心点的x坐标值乘本区域的权值
    center_pos = (centroid_sum / weight_sum) # Determine center of line.
    #中间公式
    # Convert the center_pos to a deflection angle. We're using a non-linear
    # operation so that the response gets stronger the farther off the line we
    # are. Non-linear operations are good to use on the output of algorithms
    # like this to cause a response "trigger".
    deflection_angle = 0
    #机器人应该转的角度
    # The 80 is from half the X res, the 60 is from half the Y res. The
    # equation below is just computing the angle of a triangle where the
    # opposite side of the triangle is the deviation of the center position
    # from the center and the adjacent side is half the Y res. This limits
    # the angle output to around -45 to 45. (It's not quite -45 and 45).
    deflection_angle = -math.atan((center_pos-80)/60)
    #角度计算.80 60 分别为图像宽和高的一半,图像大小为QQVGA 160x120.
    #注意计算得到的是弧度值
    # Convert angle in radians to degrees.
    deflection_angle = math.degrees(deflection_angle)
    #将计算结果的弧度值转化为角度值
    # Now you have an angle telling you how much to turn the robot by which
    # incorporates the part of the line nearest to the robot and parts of
    # the line farther away from the robot for a better prediction.
    # print("Turn Angle: %f" % deflection_angle)
    if center_pos!=0:
        output_str=json.dumps([deflection_angle])
    else:
        output_str=json.dumps([0])
    # output_str=json.dumps([deflection_angle])
    print('you send:',output_str)
    uart.write(output_str+'\n')
    # uart.write(deflection_angle+'\n')
    #将结果打印在terminal中
    lcd.display(img)
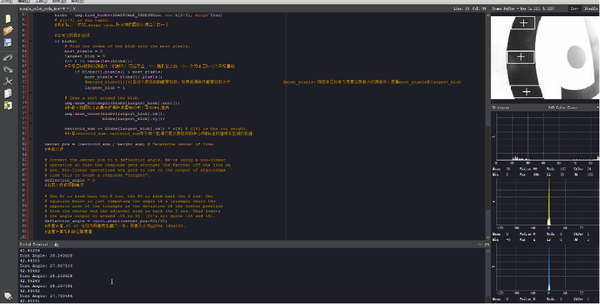
IDE运行效果为
屏幕中会对线进行标注
Microduino的代码准备
#define my_Serial Serial1
#define servoPin  6
#define LEDPin 4
#include <Servo.h>
#include <Microduino_ColorLED.h> //引用彩灯库
static const uint8_t carPinForward = 8;
static const uint8_t carPinBackward = 9;
uint8_t carPower=40;
// uint8_t carPower=0;
Servo myservo;
String degreeStr;
int pos=0;
int lastPos=0;
ColorLED strip = ColorLED(1, LEDPin);
void setup() {
  Serial.begin(115200);
  my_Serial.begin(115200);
  myservo.attach(servoPin);
  strip.begin();
  strip.setBrightness(60);
  strip.setPixelColor(0, strip.Color(255, 255, 255));
  strip.show();
  pinMode(carPinForward, OUTPUT);
  digitalWrite(carPinForward, LOW);
  pinMode(carPinBackward, OUTPUT);
  digitalWrite(carPinBackward, LOW);
}
void loop() {
  if (my_Serial.available() > 0) {
    degreeStr = my_Serial.readStringUntil('\n');
    uint8_t len=degreeStr.length();
    degreeStr=degreeStr.substring(1,len-1);
    pos=degreeStr.toInt();
  Serial.println(pos);
    if(pos!=0) {
      pos = map(pos, -50, 50, 30, 130);
      myservo.write(pos);
      lastPos=pos;
    } else {
      if(lastPos>80) {
        myservo.write(130);
      }else {
        myservo.write(30);
      }
    }
  }
  uint8_t detlaSpeed=0;
  uint8_t detlaSpeed=abs(pos-80);
  detlaSpeed=map(detlaSpeed,0,50,0,7);
  analogWrite(carPinForward, carPower-detlaSpeed);
  digitalWrite(carPinBackward, LOW);
}
