Rhythm Lamp

来自Microduino Wikipedia
1304410487@qq.com讨论 | 贡献2015年9月28日 (一) 09:29的版本
(差异) ←上一版本 | 最后版本 (差异) | 下一版本→ (差异)
跳转至: 导航搜索
Language English

Objective

Speak toward MIC, the lamp will change along with the sound rhythm.

principle

  • MIC sensor introduction

MIC sensor can turn sound signal to electricity signal. It can detect sound volume but can't detect certain sound.

  • Rhythm Lamp

Detect sound volume via MIC sensor and the system will judge which color range the sound belongs to. At the same, comparing with the pre-set trigger value and choosing to open or close light change, therefore, to control color change of the lamp.

Equipment

Moudle Number Function
mCookie-CoreUSB 1 Core board
mCookie-Hub 1 Sensor pin board
Microduino-Sound 1 Sound detection sensor
Microduino-Color led 1 Colored LED light

Preparation

  • Setup 1:Connect CoreUSB and PC/Mac with USB cable and open Arduino IDE.
  • Setup 3:Load code, copy program to IDE. Select the right boardcard and COM port and then download after passing the compiling.

Program Description

  • Read sound analog value (A0 pin), which can be defined by users. Then, print analog sound data via serial port monitor.
  int v=analogRead(A0);
  Serial.println(v);
  • Detect sound volume every 100ms and distinguish the sound. Soudn range is defined in " zone_vol[3]", which is among 100-600. Users can change that according to personal needs.
  if(millis()-timer[0]>100)
  {
    timer[0]=millis();
    if(v>zone_vol[0])
      zone=0;//Red 
    else if(v>zone_vol[1])
      zone=1;//Green 
    else if(v>zone_vol[2])
      zone=2;//Blue
    else
      zone=9;
  }
  • The analog value decides color combination.
  switch(zone)
  {
  case 0:
    if(color!=0)
      vol[0]=map(v,0,1023,0,255);//Red 
    else
      vol[0]=10;
    break;
  case 1:
    if(color!=1)
      vol[1]=map(v,0,1023,0,255);//Green 
    else
      vol[1]=10;
    break;
  case 2:
    if(color!=2)
      vol[2]=map(v,0,1023,0,255);//Blue 
    else
      vol[2]=10;
    break;
  }
  // Some example procedures showing how to display to the pixels:
  colorWipe(strip.Color(vol[0],vol[1], vol[2]), 20);

Hardware Buildup

  • Setup 1:Connect MIC to A0 pin of Sensorhub and Colored LED to A6. Both sides of Sensorhub have pin description, which can be connected with sensors accordingly.
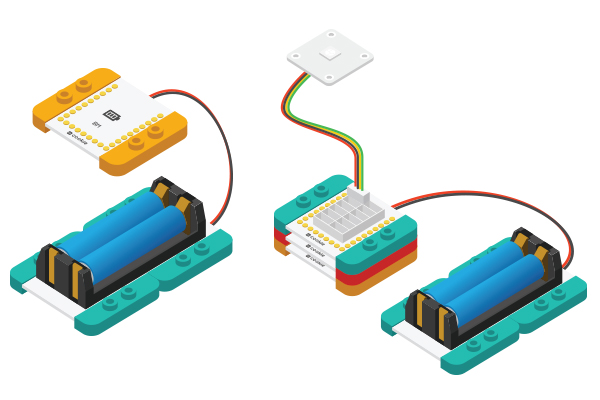
  • Setup 2:Connect the activated battery box to BM.
CoreUSB Ble steup2.jpg
  • Setup 3:Stack all modules together without fixed order and finish the circuit buildup.

Result

Speak towards MIC and you'll find different effect.

Video