“蓝牙彩灯”的版本间的差异
853387039@qq.com(讨论 | 贡献) |
853387039@qq.com(讨论 | 贡献) |
||
| 第5行: | 第5行: | ||
==概述== | ==概述== | ||
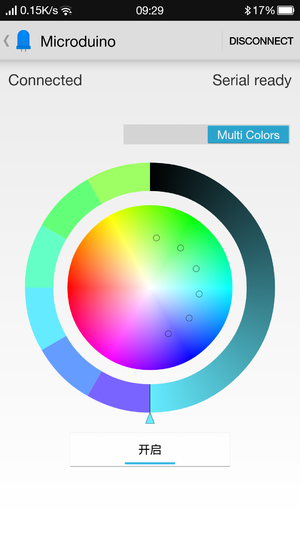
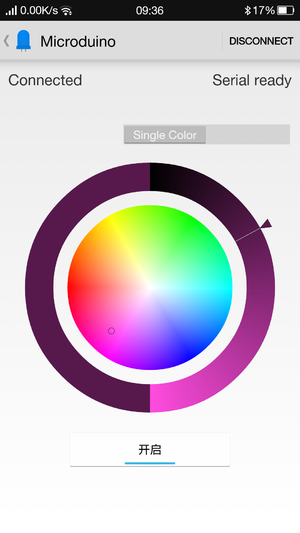
通过专用的Android App控制灯光的颜色和亮度。当手机不连接蓝牙能够自动变幻颜色,手机接入后,就可以通过手机控制灯的任意颜色了。 | 通过专用的Android App控制灯光的颜色和亮度。当手机不连接蓝牙能够自动变幻颜色,手机接入后,就可以通过手机控制灯的任意颜色了。 | ||
| − | [[File:bluetooth-light.jpg|600px]] | + | [[File:bluetooth-light.jpg|600px|center]] |
==原理== | ==原理== | ||
2015年9月2日 (三) 07:56的版本
| Language | English |
|---|
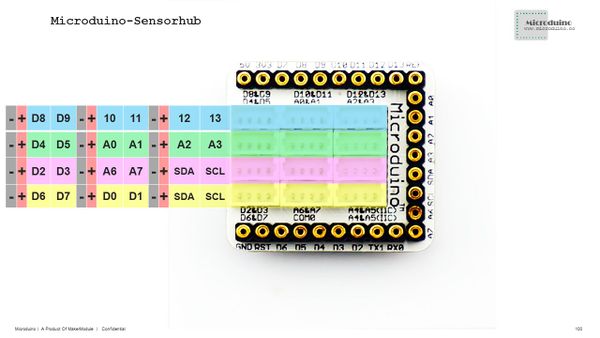
概述通过专用的Android App控制灯光的颜色和亮度。当手机不连接蓝牙能够自动变幻颜色,手机接入后,就可以通过手机控制灯的任意颜色了。 原理设备通过蓝牙与手机进行连接通讯,结合App来控制彩灯的颜色。 本套件使用了蓝牙无线通信模块Microduino-BT(4.0),关于蓝牙协议这里不再赘述,Microduino的蓝牙模块很好的屏蔽了底层的协议,使用它只需确认蓝牙串口的接法,默认是D4,D5。给出一张蓝牙通讯所使用的串口图,所有的串口连接方法都涵盖在该[图2 1]中 设备
文件:Ble lamp.jpg 600px 文档Android客户端: 注意:新版BT是蓝牙4.0,需要Android 4.3以上的系统才能支持。这里只提供Android的APP。 APP下载:'文件:Microduino-LAMP-APP.zip 搭建硬件
文件:Mic colorled ble.jpg 600px 软件调试
蓝牙模块串口使用,需要根据板子上的串口跳线确定,默认的通讯串口0:Serial #define my_Serial Serial
void ble()
{
  while (my_Serial.available())
  {
    char c = my_Serial.read();
    delay(2);

    if (c == 'C')
      buffer_sta = true;
    if (c == '\n')
    {
      color_en = true;
      safe_ms = millis();
    }
    if (buffer_sta)
    {
      buffer[buffer_num] = c;
      buffer_num++;
    }
    //  Serial.println(c);
    //Serial.println(color_en);
  }

  if (buffer_sta)
  {
    buffer_sta = false;

    sscanf((char *)strstr((char *)buffer, "C:"), "C:%d,%d,%d,%d", &sta[0], &sta[1], &sta[2], &sta[3]);

    for (int a = 0; a < buffer_num; a++)
      buffer[a] = NULL;
    buffer_num = 0;

    for (int i = 0; i < 4; i++)
    {
      Serial.print(sta[i]);
      Serial.print(",");
    }
    Serial.println(" ");

    if (-1 == sta[3]) {
      colorSet(strip.Color(sta[0], sta[1], sta[2]));
    }
    else if ((0 <= sta[3]) && (sta[3] < PIXEL_COUNT)) {
      colorSet(strip.Color(sta[0], sta[1], sta[2]), sta[3]);
    }
  }

  if (millis() - safe_ms > 3000)
  {
    safe_ms = millis();
    color_en = false;
  }
}
当有蓝牙连接时,蓝牙控制灯的颜色 if (-1 == sta[3]) {
colorSet(strip.Color(sta[0], sta[1], sta[2]));
}
else if ((0 <= sta[3]) && (sta[3] < PIXEL_COUNT)) {
colorSet(strip.Color(sta[0], sta[1], sta[2]), sta[3]);
}
否则自动控制颜色 if (!color_en)
{
rainbowCycle(10, 255, 0, 0, 0);
rainbowCycle(10, 255, 0, 0, 1);
rainbowCycle(10, 0, 255, 0, 0);
rainbowCycle(10, 0, 255, 0, 1);
rainbowCycle(10, 0, 0, 255, 0);
rainbowCycle(10, 0, 0, 255, 1);
rainbowCycle(10, 255, 0, 225, 0);
rainbowCycle(10, 255, 0, 225, 1);
rainbowCycle(10, 247, 139, 5, 0);
rainbowCycle(10, 247, 139, 5, 1);
rainbowCycle(10, 255, 255, 0, 0);
rainbowCycle(10, 255, 255, 0, 1);
rainbowCycle(10, 0, 255, 255, 0);
rainbowCycle(10, 0, 255, 255, 1);
for (int i = 0; i < 3; i++)
rainbow(30);
}
结果通过Microduino可以成功实现用手机控制彩灯,得到你想要的任意颜色。你也可以通过乐高搭建一个漂亮的外观。 视频 |
