“Rhythm Lamp”的版本间的差异
(Created page with "{{Language| Rhythm Lantern}} {| style="width: 800px;" |- | ==Purpose== To control the color of a lantern by detecting sound via mic sound detection sensor. ==Principle== ==...") |
|||
| 第39行: | 第39行: | ||
| − | *Setup 2:Code description: One part reads analog values and the other controls color | + | *Setup 2:Code description: One part reads analog values and the other controls color combination of the lantern according to the values. |
**Read analog values. | **Read analog values. | ||
<source lang="cpp"> | <source lang="cpp"> | ||
| 第73行: | 第73行: | ||
==Result== | ==Result== | ||
| − | Speak towards mic and you’ll be | + | Speak towards mic and you’ll be surprised about the effect. |
[[File:mic_colorled——legao.jpg|600px|center|thumb]] | [[File:mic_colorled——legao.jpg|600px|center|thumb]] | ||
2015年6月19日 (五) 08:42的版本
| Language | English |
|---|
PurposeTo control the color of a lantern by detecting sound via mic sound detection sensor. PrincipleEquipment
文件:Mic lamp.jpg 600px Hardware Buildup
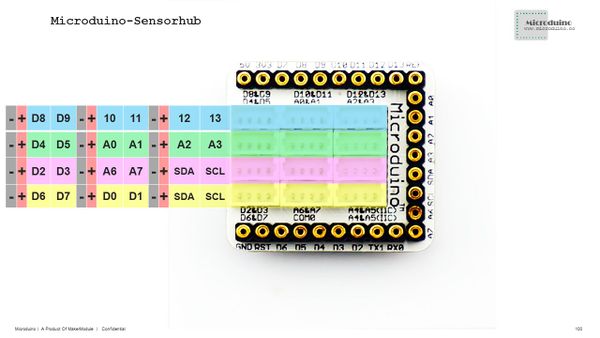
文件:CoreUSB Sensorhub.jpg 600px
文件:Mic colorled.jpg 600px Software Debugging
int v=analogRead(A0);
  switch(zone)
  {
  case 0:
    if(color!=0)
      vol[0]=map(v,0,1023,0,255);
    else
      vol[0]=10;
    break;
  case 1:
    if(color!=1)
      vol[1]=map(v,0,1023,0,255);
    else
      vol[1]=10;
    break;
  case 2:
    if(color!=2)
      vol[2]=map(v,0,1023,0,255);
    else
      vol[2]=10;
    break;
  }

  // Some example procedures showing how to display to the pixels:
  colorWipe(strip.Color(vol[0],vol[1], vol[2]), 20);
ResultSpeak towards mic and you’ll be surprised about the effect. Video |
