“Microduino-NEO-6M”的版本间的差异
Jasonsheng(讨论 | 贡献) (→Development) |
Jasonsheng(讨论 | 贡献) (→Application) |
||
| 第123行: | 第123行: | ||
**(Note:Pay attention to this,module's TXD 和 RXD can't connect to RS232 serial port on PC directly, must use the level converter chip (such as MAX232). | **(Note:Pay attention to this,module's TXD 和 RXD can't connect to RS232 serial port on PC directly, must use the level converter chip (such as MAX232). | ||
| − | == | + | ==Application== |
| − | === | + | ===Program Download=== |
| − | + | Test Program:'''[[File:Program Test NEO-6M.zip]]''' | |
| − | === | + | ===Test Microduino NEO-6M module=== |
| − | * | + | *Prepared hardware:Microduino FT232R、Microduino Core、Microduino OLED、Microduino NEO-6M; |
| − | * | + | *Prepared software:Arduino IDE(1.0 release upper)、Adafruit_GPS library、Microduino provides test program(Arduino part); |
| − | * | + | *Test environment:Open area,don't test in root; |
| − | * | + | *Put the downloaded library to the libraries folder of Arduino IDE installation fold; |
| − | * | + | *Start Arduino IED,open the test program,card type chooses "Microduino Core (Atmega328P@16M,5V)",download directly; |
| − | * | + | *Observed the OLED after the download completed: |
| − | ** | + | **After half of minute,display data and time; |
| − | ** | + | **Go on waiting,when you see PPS indicators of Microduino NEO-6M flashing, then the speed, latitude and longitude indicators can be displayed,if not, please restart Microduino Core. |
| − | === | + | ===How to use the library=== |
| − | * | + | *For Adafruit_GPS library: |
| − | ** | + | **Make sure the GPS baud rate is 38400 in function "void setup()",that is:GPS.begin(38400); |
| − | ** | + | **If you don't change the jumper cable: |
| − | *** | + | ***Unplug the Microduino NEO-6M module when downloading program; |
| − | *** | + | ***Use the Core or Core+ to debug, make sure include "Adafruit_GPS GPS(&Serial)" in program; |
| − | ** | + | **If you have changed the jumper cable: |
| − | *** | + | ***When use Core+ to debug,make sure include "Adafruit_GPS GPS(&Serial1)" in program; |
| − | *** | + | ***When use Core to debug, make sure include "SoftwareSerial mySerial(3, 2)" and "Adafruit_GPS GPS(&mySerial)" in program; |
| − | === | + | ===Use u-center configuration module to update rage=== |
| − | * | + | *Firstly, place the Microduino NEO-6M into an open area, and then connects to PC by Microduino FT232R; |
| − | * | + | *Start "u-center" software: |
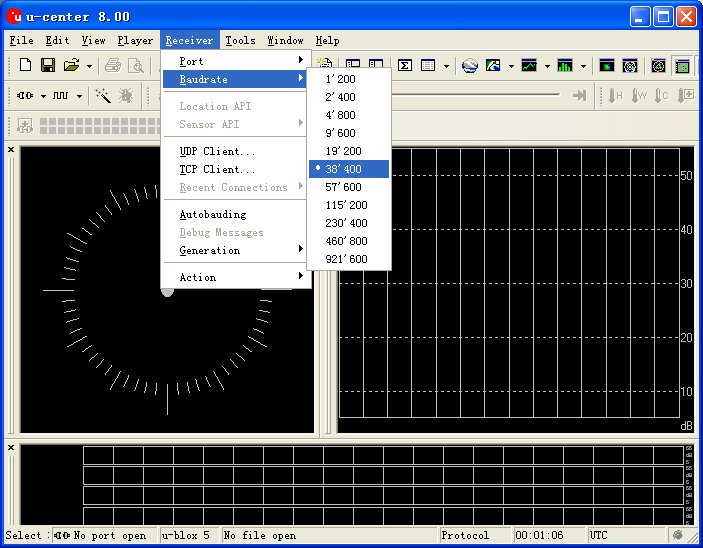
| − | ** | + | **set the baud rate:Menu:“Receiver”-“Baudrate”-“38400”; |
| − | [[File:U-center 01.jpg|thumb|703px|center| | + | [[File:U-center 01.jpg|thumb|703px|center|set baud rate]] |
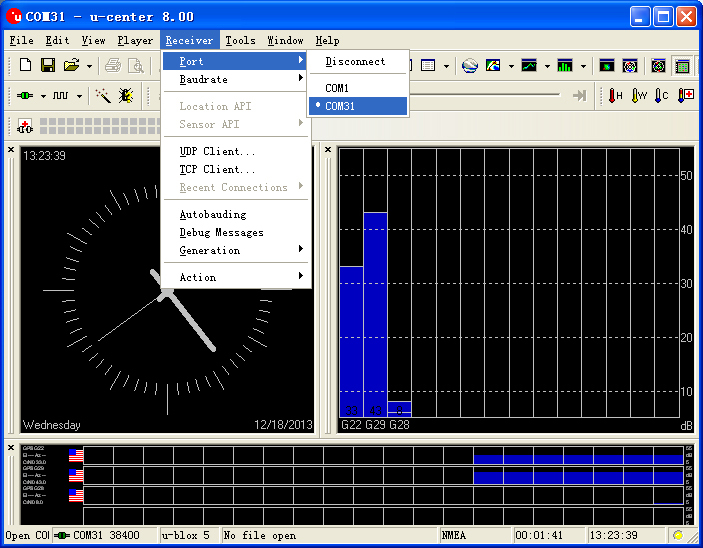
| − | ** | + | **Open the serial to start the communication:Menu:“Receiver”-“Port”- choose the port that Microduino FT232R using. |
| − | [[File:U-center 02.jpg|thumb|703px|center| | + | [[File:U-center 02.jpg|thumb|703px|center|set port]] |
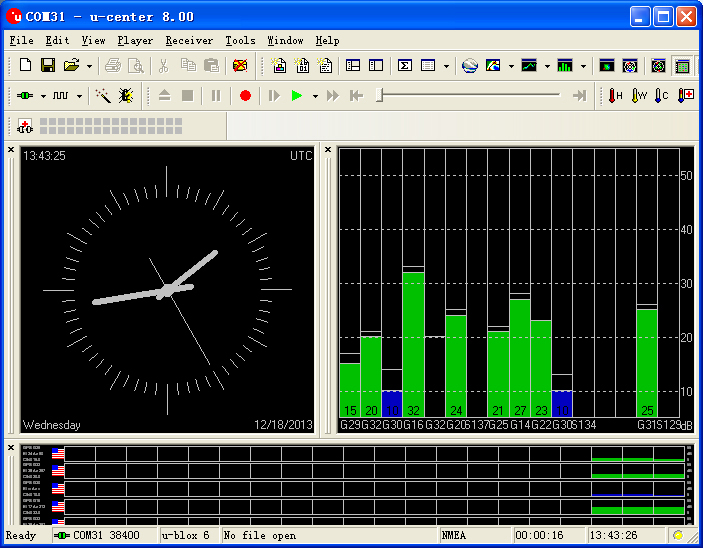
| − | ** | + | **Now,you can see the data on the "u-center"; |
| − | [[File:U-center 03.jpg|thumb|703px|center| | + | [[File:U-center 03.jpg|thumb|703px|center|data]] |
| − | * | + | *Update rate |
| − | ** | + | **Open menu:“View”-“Messages View”,display the "Messages" window; |
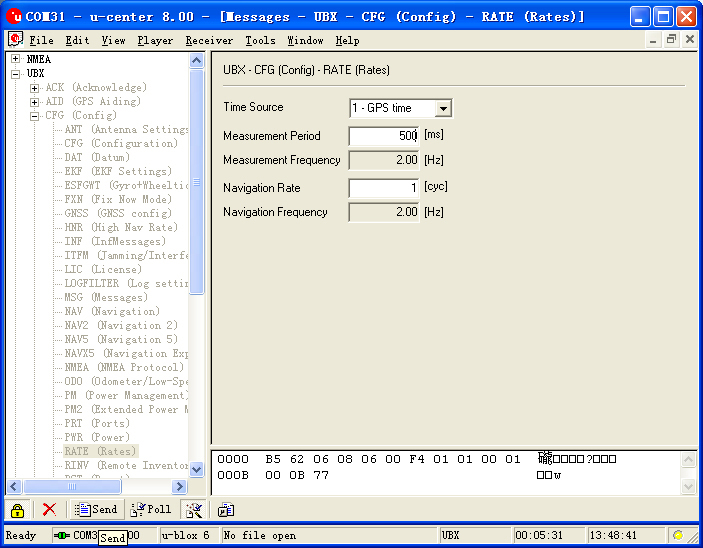
| − | ** | + | **Open“UBX”-“CFG(Config)”-“RATE(Rates)”,suppose you need 2HZ update rate, only need set the "Measurement Period" to 500ms; |
| − | ** | + | **After configured,click the "Send" button on the left bottom to send the configuration to Microduino NEO-6M module. If you see the data update quickly on other information window, that means the set successfully. |
| − | [[File:U-center 04.jpg|thumb|703px|center| | + | [[File:U-center 04.jpg|thumb|703px|center|Configure window]] |
==Pictures== | ==Pictures== | ||
2014年1月28日 (二) 06:37的版本
|
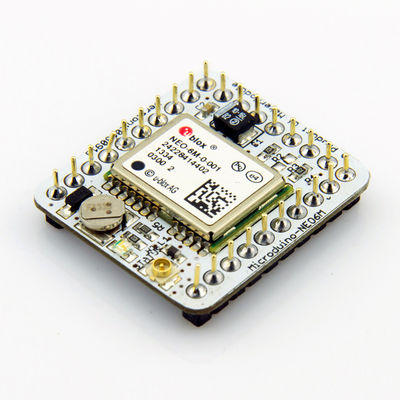
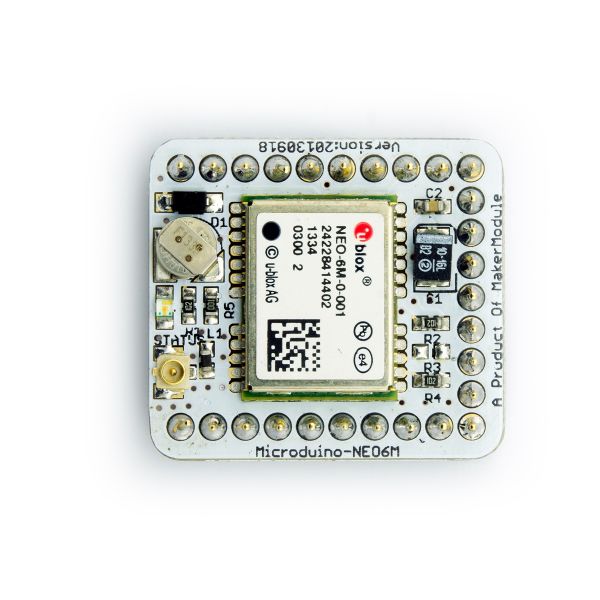
Microduino-NEO module maybe the most beautiful GPS module that you've seen. Its core module use UBLOX NEO-6M, high sensitivity, update rate up to 5Hz, using mini ceramic antenna with IPEX interface, and build-in a rechargeable battery backup. | |||||||||||||||||||||||||||||
Feature
| |||||||||||||||||||||||||||||
Specifications
Pin Description
文件:NEO6M-Pinout-2.jpg Microduino-NEO6M-Pinout 文件:NEO6M-Pinout-1.jpg Microduino-NEO6M-Pinout
DocumentEagle PCB 文件:Microduino-NEO6M.zip
Main components
Development
Arduino library and supported package
Debugging with PC
Download and debug program with FT232R and Core Module
PPS State indicator
Connection mode
ApplicationProgram DownloadTest Program:文件:Program Test NEO-6M.zip Test Microduino NEO-6M module
How to use the library
Use u-center configuration module to update rage
Pictures
| |||||||||||||||||||||||||||||
