“时钟”的版本间的差异
(Created page with "{| style="width: 800px;" |- | ==目的== 本教程将教大家如何用processing来显示Microduino时钟。 ==设备== *'''Microduino-Core''' *'''Microduino-FT232R...") |
(没有差异)
|
2014年6月5日 (四) 03:16的版本
目的本教程将教大家如何用processing来显示Microduino时钟。 设备
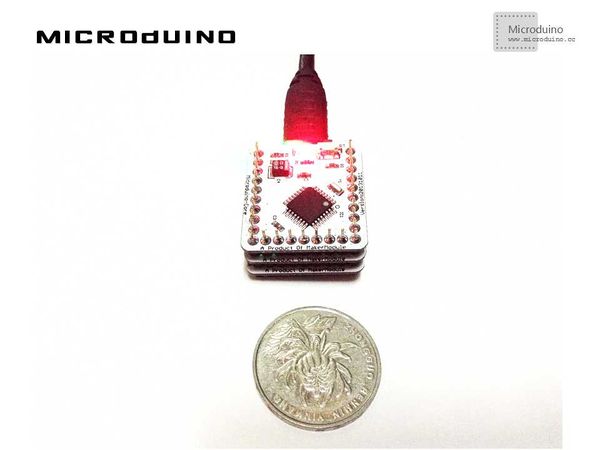
原理图堆叠设备说明中的三个Microduino模块即可 程序见 ProcessingColock MicroduinoColock 调试步骤一:按着原理图搭建硬件环境,像这样:
本例需要两端的代码,Processing端和Microduino端 Microduino: //运行RTC,并输出时间数据到串口 void loop()
{
rtc.formatDate();
rtc.formatTime();
//send time data to port
Serial.print(rtc.getHour());
Serial.print(":");
Serial.print(rtc.getMinute());
Serial.print(":");
Serial.println(rtc.getSecond());
}
//初始化时间 //inital time
void vosettime()
{
//rtc.initClock();
//day, weekday, month, century(1=1900, 0=2000), year(0-99)
rtc.setDate(4, 1, 6, 0, 14);
//hr, min, sec
rtc.setTime(15, 28, 50);
}
Processing: //得到第一个串口的数据,并定义如果有换行就缓存 // List all the available serial ports in the output pane. // You will need to choose the port that the Wiring board is // connected to from this list. The first port in the list is // port #0 and the third port in the list is port #2. println(Serial.list()); // Open the port that the Wiring board is connected to (in this case #0) // Make sure to open the port at the same speed Wiring is using (9600bps) port = new Serial(this, Serial.list()[0], 9600);
 int radius = min(width, height)/2;
 secR = radius * 0.72;
 minR = radius * 0.60;
 hourR = radius * 0.50;
 clockDiameter = radius * 1.8;
 cx = width /2 ;
 cy = height /2 ;
//串口输出鼠标x坐标值,并绘制当前值 void update(int x)
{
port.write(x);
stroke(255);
line(mouseX, 0, mouseX, 160);
text (mouseX, mouseX, 180);
}
   //split data by ":"
   String time[]=val.split(":");
   //if some exception happend, initial time is 0 colock
   try {
     hour=Integer.parseInt(time[0]);
     minute=Integer.parseInt(time[1]);
     second=Integer.parseInt(time[2]);
   }
   catch (NumberFormatException e) {
     hour=0;
     minute=0;
     second=0;
} //绘制钟表 float s = map(second, 0, 60, 0, TWO_PI) - HALF_PI;
float m = map(minute+norm(second, 0, 60), 0, 60, 0, TWO_PI)- HALF_PI;
float h = map(hour+norm(minute, 0, 60), 0, 24, 0, TWO_PI * 2 ) - HALF_PI;
//draw colock
stroke(255, 250, 0);
strokeWeight(1);
line(cx, cy, cx + cos(s) * secR, cy + sin(s) * secR);
strokeWeight(2);
line(cx, cy, cx+ minR * cos(m), cy + minR * sin(m));
strokeWeight(4);
line(cx, cy, cx + hourR * cos(h), cy + hourR * sin(h));
strokeWeight(2);
stroke(255, 0, 0);
for (int a = 0 ;a<360;a+=6) {
float angle = radians(a);
float cx1 = (secR+20) * cos(angle);
float cy1 = (secR+20) * sin(angle);
point(cx + cx1, cy + cy1);
if (a%30==0) {
line(cx+cx1, cy+cy1, cx+cx1*0.98, cy+cy1*0.98);
fill(255);
int mark;
if (a/30>9) {
mark = a/30 -9;
}
else
{
mark = a/30 +3;
}
text(mark, cx+cx1*1.05-5, cy+cy1*1.05+5);
}
fill(90, 155, 11);
text(hour+":"+minute+":"+second, cx-25, cy+100);
text("Microduino", cx-25, cy-100);
}
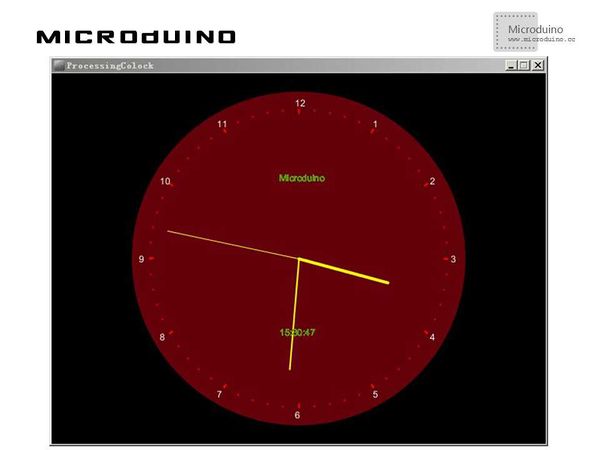
步骤三:下载代码并编译通过。 步骤四:运行后,看看processing中会出现什么。 结果屏幕上会显示一个运转的时钟,像这样
视频 |

