“Lesson 17--Microduino Button Control Digital Tube”的版本间的差异
(Created page with "{{Language | 第十七课--Microduino 独立按键让数码管加减}} {| style="width: 800px;" |- | ==Objective== This tutorial will teach you how to use the buttons to add ...") |
(没有差异)
|
2014年3月12日 (三) 12:47的版本
| Language | English |
|---|
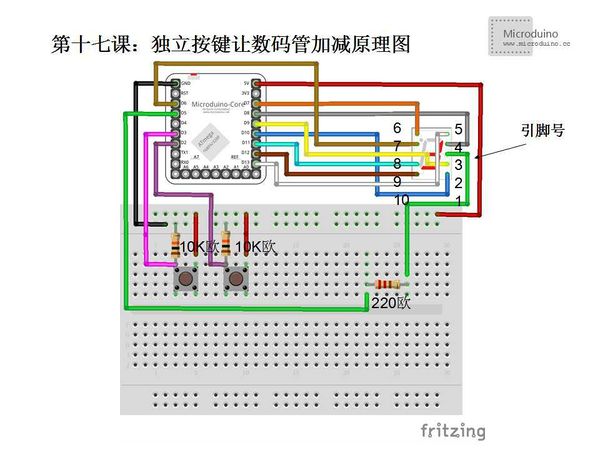
ObjectiveThis tutorial will teach you how to use the buttons to add and subtract the digital tube displayed value. There are two buttons, one is used to increase the value, another is used to decrease value. EquipmentMicroduino-Core Microduino-FT232R
SchematicPin Table
Program #include "SevSeg.h"
SevSeg sevseg;
int i=5;
void setup() {
//Define used pins
sevseg.Begin(1,2,3,4,5,6,7,8,9,10,11,12,13);
pinMode(2, INPUT); //D2 use to add
pinMode(3, INPUT); //D3 use to subtract
sevseg.PrintOutput();
sevseg.NewNum(i, 4);
}
void loop() {
//Enable the output function
sevseg.PrintOutput();
if(digitalRead(2)==HIGH) {//If press button 2
i++;
sevseg.NewNum(i, 4);
delay(200); //Delay 50ms
}
else if(digitalRead(3)==HIGH) {//If press button 3
i--;
sevseg.NewNum(i, 4);
delay(200); //Delay 50ms
}
}
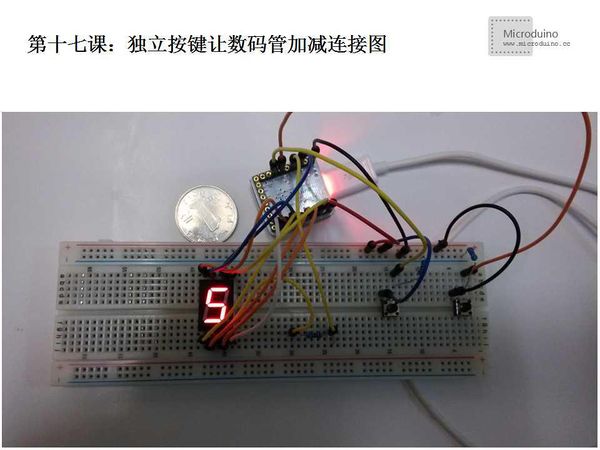
DebugFristly download the library, uncompress it and put to libraries folder of Arduino IDE, then restart Arduino IDE to load library. Library link:https://docs.google.com/file/d/0Bwrp4uluZCpNN1Q4dmFZX1MzWVE/edit This library can drive 4bits digital tube and support number, decimal point and easy to use. Step 1:Copy the code to IDE and compile it Step 2:Set up circuit, as follows: There are two buttons and use the same connection. One end connects to power and on the other end, a signal line and GND in parallel. Step 3:Run program Step 4:Digital displays initial value 5, then press that two buttons respectively, what will happen!! ResultPress two buttons respectively, the value will increase one or decrease one. Video |

