“Microduino W5500网络(四)/zh”的版本间的差异
(Created page with "{| style="width: 800px;" |- | ==目的== 本教程将教大家如何让你的Microduino变成一个聊天服务器。 ==设备== *'''Microduino-Core/zh''' *'''Microduino...") |
(→程序) |
||
| 第27行: | 第27行: | ||
==程序== | ==程序== | ||
| + | [[https://github.com/Microduino/Microduino_Tutorials/tree/master/Microduino_Advanced_Tutorial/W5500Code/MicroduinoW5500Four MicroduinoW5500Four]] | ||
==调试== | ==调试== | ||
2015年2月2日 (一) 03:09的最新版本
目的本教程将教大家如何让你的Microduino变成一个聊天服务器。 设备
原理图
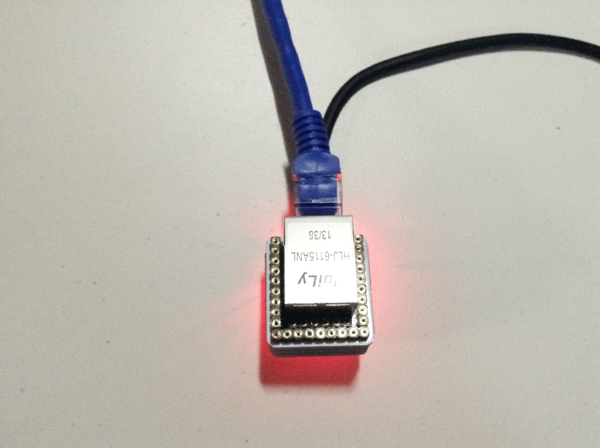
层层堆叠,再插上网线。 如下图所示: 程序调试步骤一:首先需要确保你的IDE中有_02_Microduino_Ethernet_WIZ库,如果没有下载放到你的IDE的libraries文件夹中,重启IDE。 步骤二:如果你的IDE的libraries文件夹中还有之前的Ethernet库的话,需要删除掉,因为之前的Ethernet是根据W5100协议编写的。 然后需要改动一下_02_Microduino_Ethernet_WIZ文件以使库函数与Microduino-W5500模块的引脚对应: 先找到_02_Microduino_Ethernet_WIZ库中的utility文件夹里的w5100.h 把代码中的 #define wiz_cs_pin 8 //CS_PIN 改为 #define wiz_cs_pin 10 //CS_PIN 就可以了。 步骤三:解释一下代码: // when the client sends the first byte, say hello:
if (client) {
if (!alreadyConnected) {
// clead out the input buffer:
client.flush();
Serial.println("We have a new client");
client.println("Hello, client!");
alreadyConnected = true;
} //以上代码实现监听客户端telnet连接,如果有连接输出一个友好信息。 if (client.available() > 0) {
// read the bytes incoming from the client:
char thisChar = client.read();
// echo the bytes back to the client:
server.write(thisChar);
// echo the bytes to the server as well:
Serial.write(thisChar);
}
}
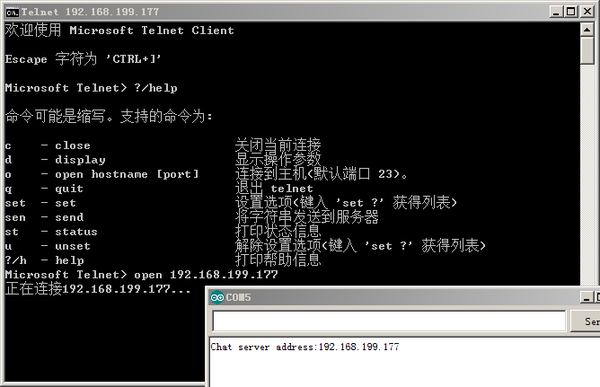
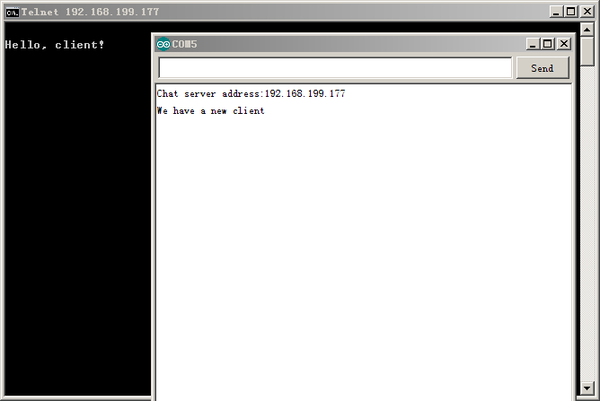
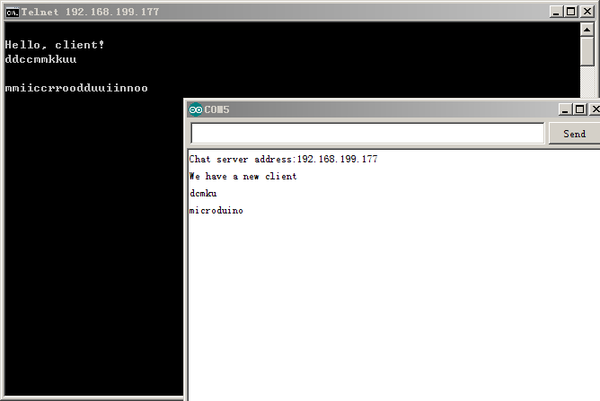
以上代码实现读取客户端的输入并把输入返回给客户端。 步骤四:下载代码并编译通过。 步骤五:先ping一下IP是否能ping通。 打开telnet: “开始”->“运行”->“telnet”,输入“?/help”可以看到帮助信息。输入“open 192.168.199.177”后回车,显示正在连接到192.168.199.177 再回车一次,串口监视器会显示“We have a new client”,telnet客户端会显示“Hello, client!”,这意味着telnet客户端已与Chat Server(Microduino-W5500)建立通信连接。 下面就可以通过telnet客户端给Chat Server服务器发消息了,Chat Server服务器通过串口监视器显示收到的信息,这时会发现每输入一个字符,telnet客户端会显示两个相同的字符! 这是因为程序中有这一句——“server.write(thisChar);// 服务器响应的数据返回给客户端”,将此句屏蔽后,重新编译链接下载就OK了!
结果通过Microduino-W5500实现了一个telnet服务器,可以接受telnet客户端发送的数据。 视频 |


