“Microduino ENC网络(八)/zh”的版本间的差异
(→调试) |
(→原理图) |
||
| (未显示2个用户的4个中间版本) | |||
| 第1行: | 第1行: | ||
| + | {{Language | Microduino_ENC_Network_(8)}} | ||
{| style="width: 800px;" | {| style="width: 800px;" | ||
|- | |- | ||
| 第6行: | 第7行: | ||
==设备== | ==设备== | ||
| − | *'''[[Microduino-Core]]''' | + | *'''[[Microduino-Core/zh]]''' |
| − | *'''[[Microduino- | + | *'''[[Microduino-USBTTL/zh]]''' |
| − | *'''[[Microduino-ENC28J60]]''' | + | *'''[[Microduino-ENC28J60/zh]]''' |
| − | *'''[[Microduino-RJ45]]''' | + | *'''[[Microduino-RJ45/zh]]''' |
*其他硬件设备 | *其他硬件设备 | ||
| − | **USB数据连接线 一根 | + | **USB数据连接线 一根 |
==图像== | ==图像== | ||
| 第51行: | 第52行: | ||
*Microduino-RJ45 | *Microduino-RJ45 | ||
*Microduino-Core | *Microduino-Core | ||
| − | *Microduino- | + | *Microduino-USBTTL |
层层堆叠,再插上网线。 | 层层堆叠,再插上网线。 | ||
| − | |||
==程序== | ==程序== | ||
| − | https://github.com/Microduino/Microduino_Tutorials/tree/master/Microduino_ENC/ENCnetworkeight | + | [https://github.com/Microduino/Microduino_Tutorials/tree/master/Microduino_ENC/ENCnetworkeight ENCnetworkeight] |
| − | |||
==调试== | ==调试== | ||
| 第83行: | 第82行: | ||
bfill.emit_raw_p(png_image, image_size); | bfill.emit_raw_p(png_image, image_size); | ||
ether.httpServerReply(bfill.position()); | ether.httpServerReply(bfill.position()); | ||
| − | } | + | } |
//如果浏览器的请求中包含?LEDx,Led的状态发生改变,HTML页面重新创建,根据Led的状态设定正确的图标。 | //如果浏览器的请求中包含?LEDx,Led的状态发生改变,HTML页面重新创建,根据Led的状态设定正确的图标。 | ||
2015年1月27日 (二) 12:37的最新版本
| Language | English |
|---|
目的本教程将教大家如何控制两个Led,并用更为时尚的网页元素—图像。 设备
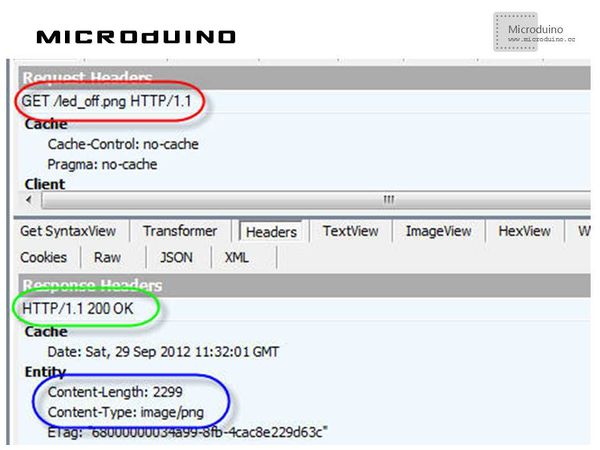
图像首先你要明白当一个网页引用了一些外部资源(如图像,javascript...)后的处理流程:
当服务器应答,它在响应的头文件中告诉浏览器他发送的文件MIME类型。下面这个例子(用Fiddler嗅探)是关于PNG图像。 Microduino代码应该能够:
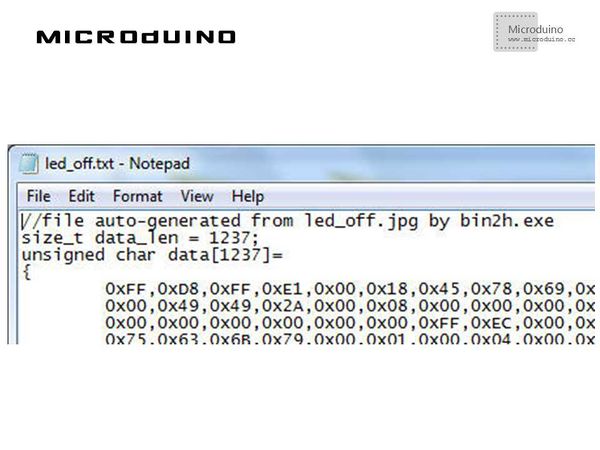
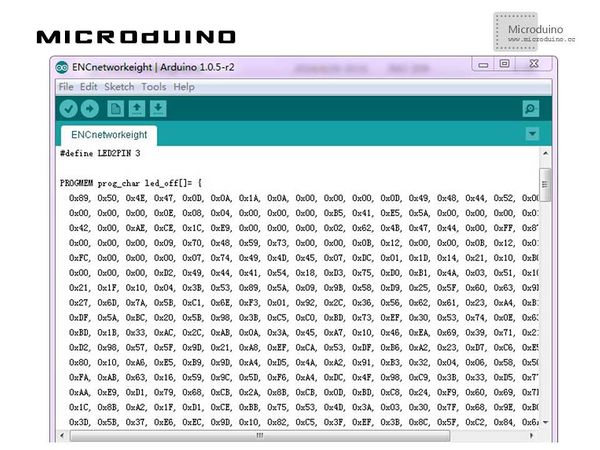
二进制资源图片是一个二进制文件,在这个例子中我们应该能够把它以字节数组(byte arrays)的形式存放在我们的代码中。bin2h这个工具可以帮助我们进行转换。 转换结果是一个文本文件: 为了节省Microduino内存,我们用PROGMEM指令存储在flash中:
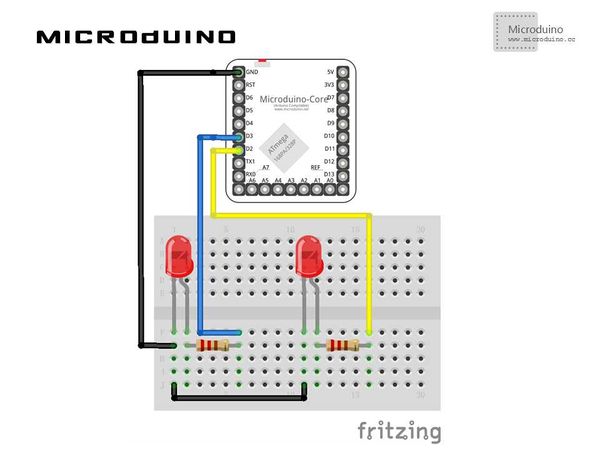
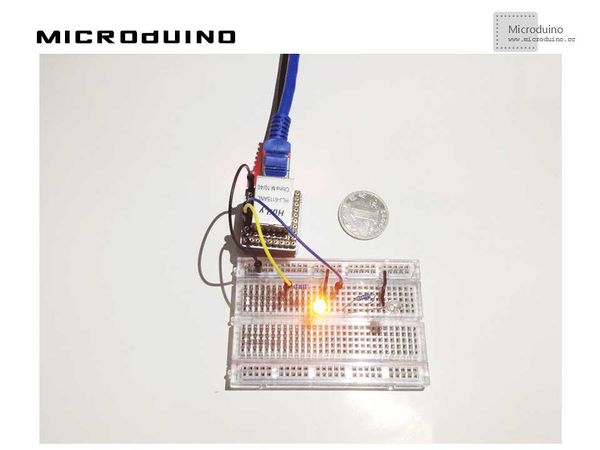
原理图
层层堆叠,再插上网线。 程序调试步骤一:首先需要下载EtherCard库:https://github.com/jcw/ethercard 放到你的IDE的libraries文件夹中,重启IDE。 步骤二:解释一下代码: //我们的代码解析浏览器的请求,如果请求两个图片中的一个图片,调用send_png_image()方法,把它发送给浏览器。 if(strstr((char *)Ethernet::buffer + pos, "GET /led_off.png") != 0)
send_png_image(led_off, sizeof(led_off));
else if(strstr((char *)Ethernet::buffer + pos, "GET /led_on.png") != 0)
send_png_image(led_on, sizeof(led_on));
//这个方法准备正确头文件及用emit_raw_p方法添加图形文件的二进制数据到响应,最后用httpServerReply()发送响应给浏览器。
 BufferFiller bfill = ether.tcpOffset();
 bfill.emit_p(PSTR("HTTP/1.0 200 OK\r\n"
   "Content-Type: image/png\r\n\r\n"));
 bfill.emit_raw_p(png_image, image_size);
 ether.httpServerReply(bfill.position());
 }
//如果浏览器的请求中包含?LEDx,Led的状态发生改变,HTML页面重新创建,根据Led的状态设定正确的图标。 if(strstr((char *)Ethernet::buffer + pos, "GET /?LED1") != 0) {
led1Status = !led1Status;
digitalWrite(LED1PIN, led1Status);
}
步骤五:用浏览器访问Microduino的IP地址后,点击页面上的连个图标按钮,看看灯泡有啥反应。 结果访问你的Microduino IP地址,当用户点击其中一个图标,浏览器将请求该页面并添加?LEDx后缀:Microduino将改变相应的Led状态和图标的颜色。
视频 |
