“Core STM32 Startup Guide”的版本间的差异
(→Setup Microduino-CoreSTM32 with ST-Link debugger) |
|||
| (未显示2个用户的2个中间版本) | |||
| 第5行: | 第5行: | ||
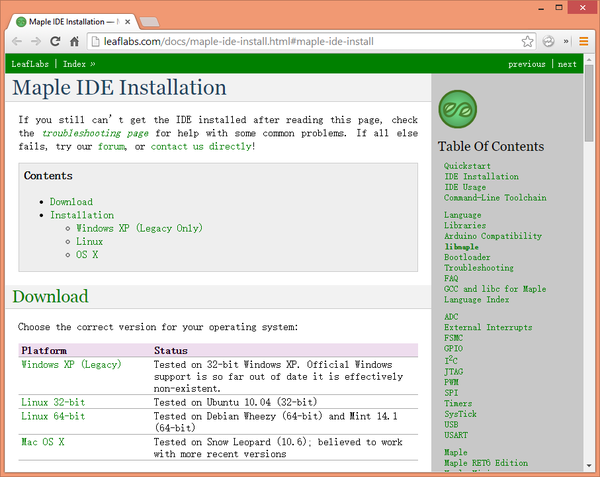
* Download Maple IDE on | * Download Maple IDE on | ||
| − | + | **[http://pan.baidu.com/s/1kTklhVD Baidu] | |
| + | **[https://github.com/wasdpkj/Microduino-IDE/ github] | ||
* Although the document says Maple only supports WinXP 32-bit, but you can also run it on Windows 7 or Windows 8 with some workaroud. | * Although the document says Maple only supports WinXP 32-bit, but you can also run it on Windows 7 or Windows 8 with some workaroud. | ||
[[File:01_download_maple.png|thumb|center|600px|Download Maple IDE]] | [[File:01_download_maple.png|thumb|center|600px|Download Maple IDE]] | ||
| 第22行: | 第23行: | ||
= Programming Microduino-CoreSTM32 = | = Programming Microduino-CoreSTM32 = | ||
| − | * Make sure you have already installed driver of CoreSTM32 | + | * Make sure you have already installed driver of CoreSTM32.If you use the upper software, you should installed all the packate for STM32 module. |
| − | |||
| − | |||
* Run Maple IDE, click menu Tools -> Board, select Microduino-CoreSTM32 to RAM if you just want to test the program, or Microduino-CoreSTM32 to Flash if you want to run the program after resetting the board. | * Run Maple IDE, click menu Tools -> Board, select Microduino-CoreSTM32 to RAM if you just want to test the program, or Microduino-CoreSTM32 to Flash if you want to run the program after resetting the board. | ||
| 第35行: | 第34行: | ||
{| class="wikitable" | {| class="wikitable" | ||
|- | |- | ||
| − | ! SWD Pin !! JTAG Pin !! Pin Name !! CoreSTM32 Pin !! Description | + | ! SWD Pin !! JTAG Pin !! Pin Name !! CoreSTM32 Pin !! MCU Pin !! Description |
|- | |- | ||
| − | | 1 || 1 || VDD_TARGET || 3V3 || VDD from the CoreSTM32 | + | | 1 || 1 || VDD_TARGET || 3V3 || VDD || VDD from the CoreSTM32 |
|- | |- | ||
| − | | 2 || 9 || SW_CLK || D6 || SWD Clock | + | | 2 || 9 || SW_CLK || D6 || PA14 || SWD Clock |
|- | |- | ||
| − | | 3 || 8 || GND || GND || Ground | + | | 3 || 8 || GND || GND || GND || Ground |
|- | |- | ||
| − | | 4 || 7 || SWDIO || D5 || SWD Data input/output | + | | 4 || 7 || SWDIO || D5 || PA13 || SWD Data input/output |
|- | |- | ||
| − | | 5 || 15 || NRST || RST || Reset | + | | 5 || 15 || NRST || RST || NRST || Reset |
|- | |- | ||
| − | | 6 || 13 || SWO || D8 || TRACESWO if async trace enabled, not necessary | + | | 6 || 13 || SWO || D8 || PB3 || TRACESWO if async trace enabled, not necessary |
|} | |} | ||
2015年7月15日 (三) 08:44的最新版本
目录Setup Microduino-CoreSTM32 with Maple IDE (Windows)
If you ar using Windows 7 64bit or Windows 8Try this http://wiki.leaflabs.com/Maple_IDE_Windows_8_Installation Programming Microduino-CoreSTM32
Setup Microduino-CoreSTM32 with ST-Link debuggerIf you have a ST-Link debugger or a STMicroelectronics' Discovery board, you can debug and download programs using ST-Link. ST-Link Debugger connection
Download bootloader(firmware) using Microduino-USB2TTL
文件:STM32 flash loader 1.png Flash loader - 1
文件:STM32 flash loader 2.png Flash loader - 2
文件:STM32 flash loader 3.png Flash loader - 3
文件:STM32 flash loader 4.png Flash loader - 4
文件:STM32 flash loader 5.png Flash loader - 5
|
