|
|
| (未显示同一用户的3个中间版本) |
| 第5行: |
第5行: |
| | | | |
| | [[S4A Scratch Getting started]] | | [[S4A Scratch Getting started]] |
| − | ||
| |
| − | [[File:microduino_S4A.jpg|400px|right|thumb]]
| |
| − | |}
| |
| − | {| style="width: 800px;"
| |
| − | |-
| |
| − | |
| |
| − | [[S4A Scratch Getting started]]
| |
| − | ||
| |
| − | [[File:microduino_ArduBlock.jpg|400px|right|thumb]]
| |
| − | |}
| |
| − |
| |
| − | {| style="width: 800px;"
| |
| − | |-
| |
| − | |
| |
| − | ==软件准备==
| |
| − | {| style="width: 800px;"
| |
| − | |-
| |
| − | |
| |
| − | *Arduino IDE-编程软件,在'''[[Microduino Getting started/zh]]'''中下载。
| |
| − |
| |
| − |
| |
| − | *S4A-编程软件。在S4A官网:'''[http://s4a.cat/ S4A]'''。本地下载:[[File:S4A.zip]]
| |
| − |
| |
| − |
| |
| − | * 软件通信支持包,需要下载安装到Microduino核心板卡中。本地下载:[[File:S4AFirmware15.zip]]
| |
| | || | | || |
| | [[File:Scratch-s4a.jpg|289px|right|thumb]] | | [[File:Scratch-s4a.jpg|289px|right|thumb]] |
| − | |}
| |
| − |
| |
| − | ==硬件准备==
| |
| − | {| style="width: 800px;"
| |
| − | |-
| |
| − | |
| |
| − | *Microduino设备
| |
| − | **[[Microduino-Core/zh]]
| |
| − | **[[Microduino-USBTTL/zh]]
| |
| − |
| |
| − | *其他设备
| |
| − | **电脑
| |
| − | **USB数据线
| |
| − |
| |
| − | ||
| |
| − | [[File:microduinoGettingStartHeader.jpg|289px|right|thumb]]
| |
| − | |}
| |
| − |
| |
| − | ==连接硬件==
| |
| − | {| style="width: 800px;"
| |
| − | |-
| |
| − | |
| |
| − | *搭建Microduino开发环境,参考:'''[[Microduino Getting started/zh]]'''。
| |
| − | *将Microduino-Core和Microduino-USBTTL模块叠加,通过USB数据线连接到电脑。
| |
| − | *用Arduino IDE打开程序“S4AFirmware15”,选择好板卡和端口,将程序下载到Microduino-Core核心中。
| |
| − | ||
| |
| − | [[File:Arduino IDE.jpg|289px|right|thumb]]
| |
| | |} | | |} |
| | {| style="width: 800px;" | | {| style="width: 800px;" |
| | |- | | |- |
| | | | | | |
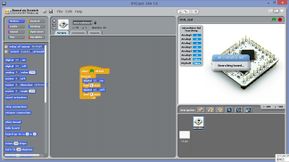
| − | *安装S4A编程软件,打开S4A,自动连接到到Microduino板子。可以看到连接的端口号并且能监测到模拟口的数据。
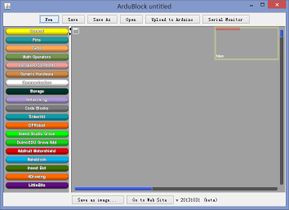
| + | [[ArduBlock Scratch Getting started/zh]] |
| − | *搭建完毕就可以愉快的玩耍了。
| |
| | || | | || |
| − | [[File:Scratch—microduino—ok.jpg|289px|right|thumb]] | + | [[File:Microduino_ArduBlock_face.jpg|289px|right|thumb]] |
| − | |}
| |
| − | | |
| − | ==教程==
| |
| − | [[LED灯闪烁实验]]
| |
| | |} | | |} |

