“体感互动-超声波”的版本间的差异
(→程序) |
(→设备) |
||
| 第7行: | 第7行: | ||
==设备== | ==设备== | ||
| − | *'''[[Microduino-Core]]''' | + | *'''[[Microduino-Core/zh]]''' |
| − | *'''[[Microduino- | + | *'''[[Microduino-USBTTL/zh]]''' |
*其他硬件设备 | *其他硬件设备 | ||
| 第15行: | 第15行: | ||
**面包板 一个 | **面包板 一个 | ||
**跳线 一盒 | **跳线 一盒 | ||
| − | |||
| − | |||
==原理图== | ==原理图== | ||
2014年10月29日 (三) 07:09的版本
目的本教程将教大家如何把超声波传感器测到的距离以曲线图的方式在Processing中显示。 设备
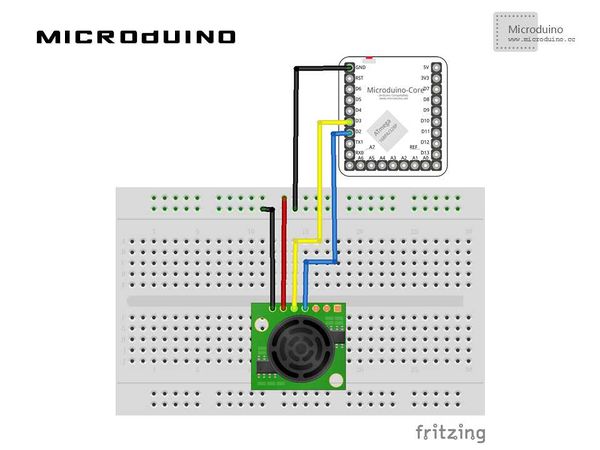
原理图
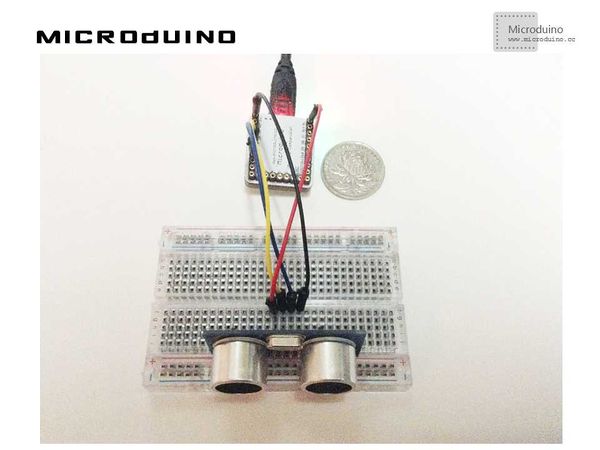
程序调试步骤一:按着原理图搭建硬件环境,像这样:
本例需要两端的代码,Processing端和Microduino端 Microduino: //计算出距离数据后输出到串口以便Processing显示 void loop()
{
digitalWrite(TrigPin, LOW);
delayMicroseconds(2);
digitalWrite(TrigPin, HIGH);
delayMicroseconds(10);
digitalWrite(TrigPin, LOW);
cm = pulseIn(EchoPin, HIGH) / 58.0; //Echo time will be converted into cm
cm = (int(cm * 100.0)) / 100.0; //Two decimal places
Serial.println(cm);
delay(100);
}
Processing: //得到第一个串口的数据,并定义如果有换行就缓存 // is always my Arduino, so I open Serial.list()[0].
// Open whatever port is the one you're using.
myPort = new Serial(this, Serial.list()[0], 9600);
myPort.bufferUntil('\n'); // Trigger a SerialEvent on new line
//把从Microduino接收到的数据以曲线图的形式显示在屏幕上,并标上标尺 void draw() {
background(255);
// Draw lines connecting all points
for (int i = 0; i < vals.length-1; i++) {
stroke(0);
strokeWeight(1);
line(i, vals[i], i+1, vals[i+1]);
}
// Slide everything down in the array
for (int i = 0; i < vals.length-1; i++) {
vals[i] = vals[i+1];
}
// Add a new random value
//vals[vals.length-1] = random(height);
String val = myPort.readStringUntil('\n');
if (val != null) {
val = trim(val);
println(val);
cm=Float.parseFloat(val);
}
vals[vals.length-1] = 200-cm;
//Display scale
text ( "200-", 370, 10);
text ( "--", 370, 50);
text ( "100-", 370, 100);
text ( "--", 370, 150);
text ( "0-", 370, 200);
//show current num
text ( cm, 0, 10);
}
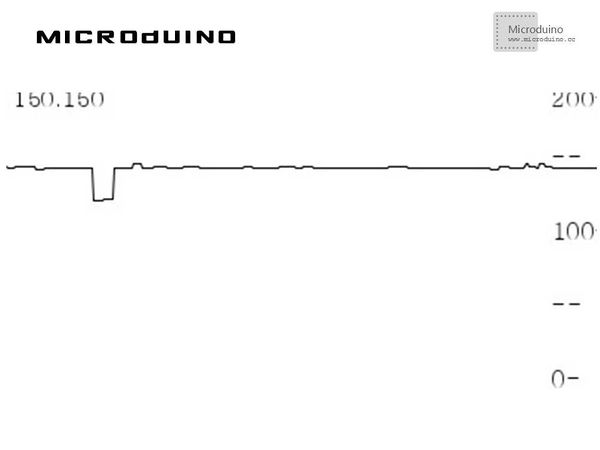
步骤三:下载代码并编译通过。 步骤四:运行后,在超声波传感器前边放一些障碍物,看看能不能显示出距离数据。 结果屏幕上会显示距离的曲线图数据,像这样:
视频 |


