“开源智能彩虹音乐触摸灯/zh”的版本间的差异
(→导入音频文件) |
1196357542(讨论 | 贡献) |
||
| (未显示3个用户的35个中间版本) | |||
| 第9行: | 第9行: | ||
*耗时:2小时 | *耗时:2小时 | ||
*制作者:ray | *制作者:ray | ||
| − | 简介: | + | *简介: |
| − | *使用Microduino产品模块快速搭建一个智能彩虹音乐触摸灯 | + | **使用Microduino产品模块快速搭建一个智能彩虹音乐触摸灯 |
| − | *该系统通过触摸按键探测表面是否有人触摸 | + | **该系统通过触摸按键探测表面是否有人触摸 |
| − | *当有人触摸时,就会有对应位置的彩灯亮并产生一个对应的音符 | + | **当有人触摸时,就会有对应位置的彩灯亮并产生一个对应的音符 |
[[File:Microduino_1.JPG]] | [[File:Microduino_1.JPG]] | ||
| 第22行: | 第22行: | ||
|模块||数量||功能 | |模块||数量||功能 | ||
|- | |- | ||
| − | + | |[[Microduino-Core/zh]]||1||核心板 | |
| − | |||
| − | |[[Microduino-Core | ||
|- | |- | ||
|[[Microduino-USBTTL/zh]] ||1||下载程序 | |[[Microduino-USBTTL/zh]] ||1||下载程序 | ||
| − | |||
| − | |||
|- | |- | ||
|[[Microduino-Audio/zh]] ||1||音频播放 | |[[Microduino-Audio/zh]] ||1||音频播放 | ||
| 第36行: | 第32行: | ||
|[[Microduino-Sensorhub/zh]] ||1||与传感器相连 | |[[Microduino-Sensorhub/zh]] ||1||与传感器相连 | ||
|- | |- | ||
| − | |[[ | + | |[[Sensor-Touch Button/zh]] ||7||触摸传感器 |
|- | |- | ||
| − | |[[Microduino- | + | |[[Microduino-Cube-S1/zh]]||1||扩展板 |
|} | |} | ||
*其他设备 | *其他设备 | ||
| 第49行: | 第45行: | ||
|喇叭 ||1||发声 | |喇叭 ||1||发声 | ||
|- | |- | ||
| − | | | + | |尼龙螺丝 ||4||固定模块 |
| + | |- | ||
| + | |尼龙螺母 ||4||固定模块 | ||
| + | |- | ||
| + | |尼龙螺丝柱 ||4||固定模块 | ||
| + | |- | ||
| + | |双面胶 ||7||固定传感器 | ||
|- | |- | ||
|彩灯带 ||1|| | |彩灯带 ||1|| | ||
| 第57行: | 第59行: | ||
==实验原理== | ==实验原理== | ||
| − | * | + | *开源智能彩虹音乐触摸灯主要分为触摸检测与音频播放两个部分: |
| − | * | + | **触摸检测部分:采用按键触摸传感器[[Sensor-Touch Button/zh]],能够检测是否有人触摸 |
| − | *控制部分主要为声光控制,发光部件采用14个彩灯为一的彩灯带,能让彩虹灯呈现美轮美奂的颜色 | + | ***控制部分主要为声光控制,发光部件采用14个彩灯为一的彩灯带,能让彩虹灯呈现美轮美奂的颜色 |
| − | * | + | **音频播放部分:通过[[Microduino-Audio/zh]]模块管理音频文件 |
| − | *[[Microduino-Amplifier/zh]] | + | ***[[Microduino-Amplifier/zh]]功率放大模块驱动1个喇叭发出动听的声音 |
[[File:Microduino_2.JPG||600px|center]] | [[File:Microduino_2.JPG||600px|center]] | ||
| − | |||
| − | |||
| − | |||
==下载程序== | ==下载程序== | ||
*触摸灯代码github:[https://github.com/Microduino/BluButterflyLight BluButterflyLight] | *触摸灯代码github:[https://github.com/Microduino/BluButterflyLight BluButterflyLight] | ||
| − | |||
| − | |||
==程序烧写== | ==程序烧写== | ||
| − | *将[[Microduino-Core | + | *将[[Microduino-Core/zh]]、[[Microduino-USBTTL/zh]]堆叠在一起 |
| + | **用数据线连接其中的[[Microduino-USBTTL/zh]]准备上传程序。 | ||
**注意:最好不要将所有模块堆叠在一起之后再上传程序 | **注意:最好不要将所有模块堆叠在一起之后再上传程序 | ||
*打开Arduino IDE for Microduino,环境,(搭建参考:[[AVR核心:Getting started/zh]]) | *打开Arduino IDE for Microduino,环境,(搭建参考:[[AVR核心:Getting started/zh]]) | ||
| − | * | + | *点击【工具】,确认板卡(Microduino-Core)处理器(Atmega328P@16M,5V)选择无误,并选中对应端口号(COMX) |
| − | * | + | *点击【文件】->【打开】,浏览到项目程序地址,点击“BluButterflyLight.ino”程序打开 |
| − | *几项都无误后,点击 | + | *几项都无误后,点击"→"按钮下载程序到开发板上 |
| − | == | + | ==存储音频== |
| − | * | + | *音频存储方法请参考以下页面:[https://www.microduino.cn/wiki/index.php/Microduino-Module_Audio/zh#.E5.BC.80.E5.8F.91 音频下载] |
| − | |||
| − | |||
| − | |||
| − | |||
| − | |||
| − | |||
| − | |||
| − | |||
==拼装彩虹触摸灯== | ==拼装彩虹触摸灯== | ||
| − | * | + | *Step1: |
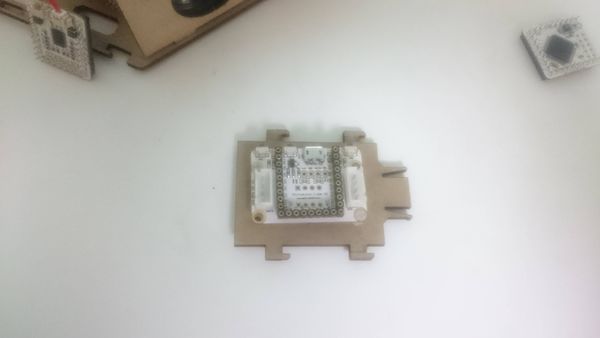
**拼装时首先将[[Microduino-Shield Cube-S1/zh]]板用尼龙螺柱固定在底板上面。 | **拼装时首先将[[Microduino-Shield Cube-S1/zh]]板用尼龙螺柱固定在底板上面。 | ||
[[File:Microduino_3.jpg||600px|center]] | [[File:Microduino_3.jpg||600px|center]] | ||
| − | * | + | *Step2: |
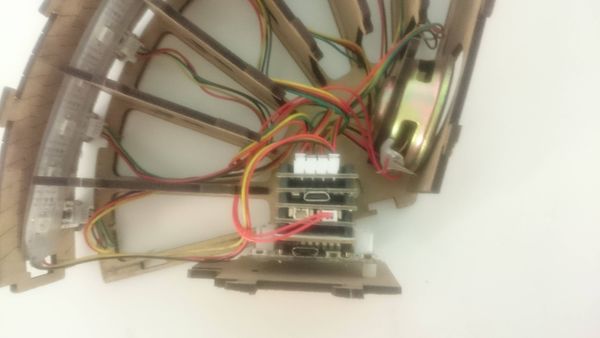
| − | + | **将以下模块叠加到[[Microduino-Cube-S1/zh]]底板上 | |
| − | + | ***[[Microduino-Sensorhub/zh]] | |
| − | **[[Microduino- | + | ***[[Microduino-Audio/zh]] |
| − | **[[Microduino- | + | ***[[Microduino-Amplifier/zh]] |
| − | **[[Microduino-Audio/zh]] | + | ***[[Microduino-Core/zh]] |
| − | **[[Microduino-Amplifier/zh]] | ||
| − | **[[Microduino-Core | ||
| − | |||
| − | |||
[[File:Microduino_4.jpg||600px|center]] | [[File:Microduino_4.jpg||600px|center]] | ||
| − | * | + | *Step3: |
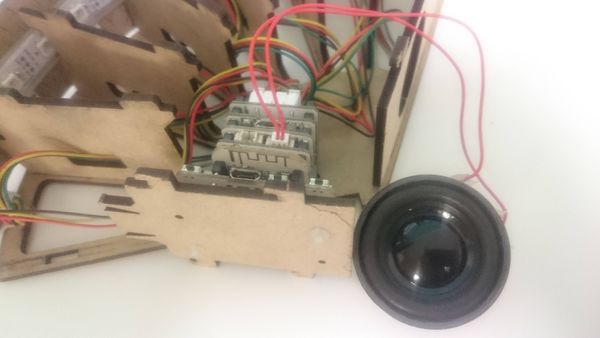
| − | *将喇叭连接到[[Microduino-Amplifier/zh]]的接口上(没有左右顺序区别) | + | **将喇叭连接到[[Microduino-Amplifier/zh]]的接口上(没有左右顺序区别) |
[[File:Microduino_5.jpg||600px|center]] | [[File:Microduino_5.jpg||600px|center]] | ||
| − | * | + | *Step4: |
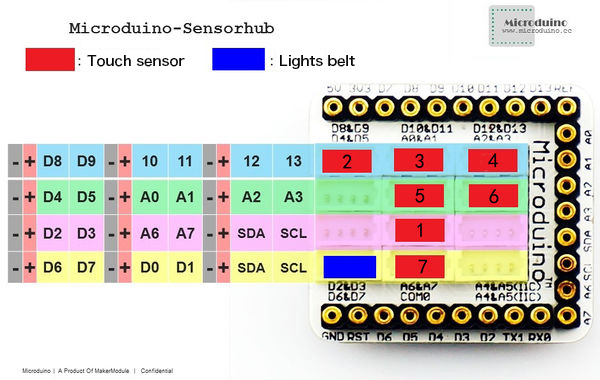
| − | * | + | **触摸传感器与彩灯带在[[Microduino-Sensorhub/zh]]上所对应的IO口序号如图所示 |
[[File:Microduino_6.JPG||600px|center]] | [[File:Microduino_6.JPG||600px|center]] | ||
| − | * | + | *Step5: |
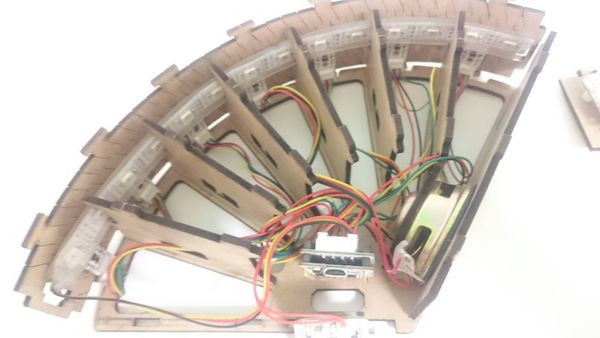
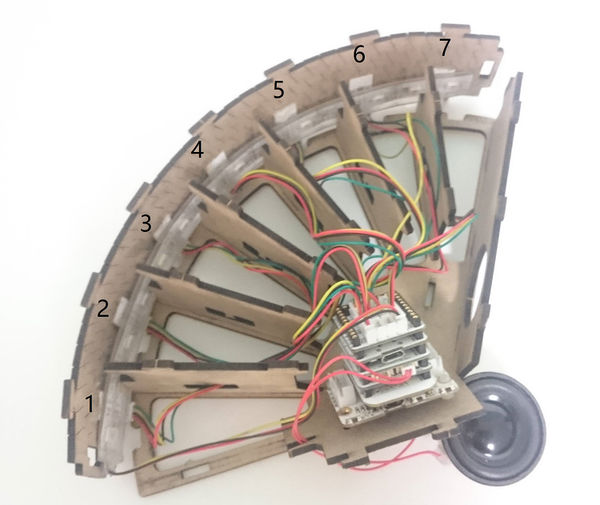
| − | * | + | **如图所示彩灯带穿过去 |
| + | **触摸传感器按照上面图和下面图对应顺序依次连接 | ||
[[File:Microduino-7.jpg||600px|center]] | [[File:Microduino-7.jpg||600px|center]] | ||
| − | * | + | *Step6: |
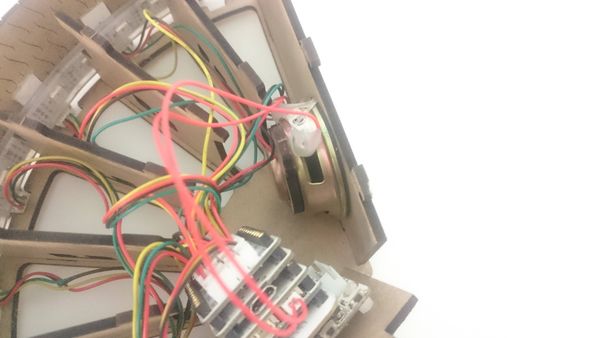
| − | *喇叭的固定座放在喇叭上 | + | **喇叭的固定座放在喇叭上 |
| − | + | **然后将固定座和喇叭一起连接到外壳 | |
| − | |||
| − | * | ||
| − | *然后将固定座和喇叭一起连接到外壳 | ||
[[File:Microduino-9.jpg||600px|center]] | [[File:Microduino-9.jpg||600px|center]] | ||
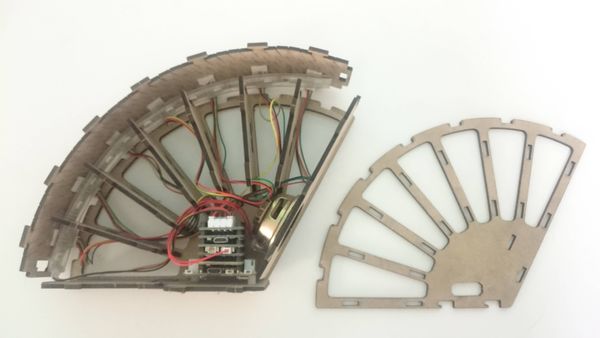
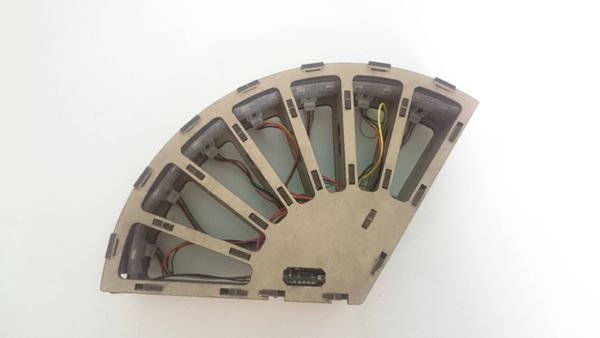
| − | * | + | *Step7: |
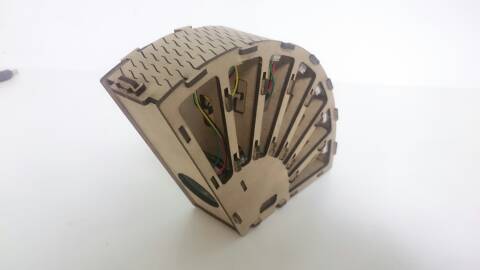
| − | *之后把内部结构拼好 | + | **之后把内部结构拼好 |
[[File:Microduino-10.jpg||600px|center]] | [[File:Microduino-10.jpg||600px|center]] | ||
| − | * | + | *Step8: |
| − | * | + | **最后把侧面也装上,这样彩虹灯外形拼好 |
[[File:Microduino-11.jpg||600px|center]] | [[File:Microduino-11.jpg||600px|center]] | ||
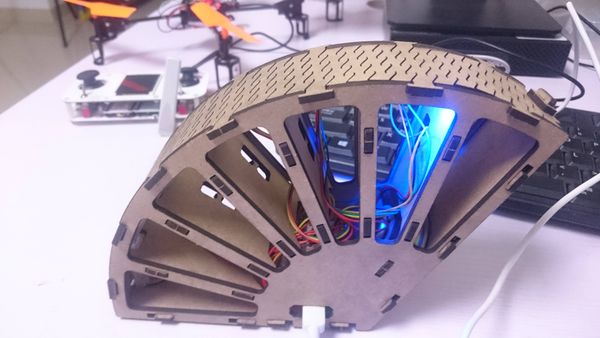
| − | + | ==操作说明== | |
| − | |||
*然后用USB数据线将电脑和彩虹触摸灯连接上 | *然后用USB数据线将电脑和彩虹触摸灯连接上 | ||
*用手触摸彩虹灯上面,就会产生一个音符并在对应位置LED灯亮 | *用手触摸彩虹灯上面,就会产生一个音符并在对应位置LED灯亮 | ||
| − | |||
[[File:Microduino-12.jpg||600px|center]] | [[File:Microduino-12.jpg||600px|center]] | ||
| 第146行: | 第128行: | ||
|} | |} | ||
| + | |||
| + | |||
| + | |||
| + | ==新版== | ||
| + | [[开源智能彩虹音乐触摸灯|进入新版开源智能彩虹音乐触摸灯界面]] | ||
2017年8月15日 (二) 10:33的最新版本
| Language | English |
|---|
概述
材料清单
实验原理
下载程序
程序烧写
存储音频
拼装彩虹触摸灯
操作说明
视频 |
