“鼓掌热度仪”的版本间的差异
853387039@qq.com(讨论 | 贡献) |
(→搭建硬件) |
||
| (未显示2个用户的10个中间版本) | |||
| 第4行: | 第4行: | ||
| | | | ||
==目的== | ==目的== | ||
| − | + | 检测鼓掌声音,声音持续时间越长,灯光亮度越强。当灯到最亮时,蜂鸣器报警提醒。 | |
| + | [[File: Applause_heat.jpg|600px|center]] | ||
==原理== | ==原理== | ||
| − | + | 通过MIC声音检测传感器来检测鼓掌声音大小,当超过预设的声音大小时,开始计数,时间越长数据越大,与此同时灯光的颜色也越来越亮了。当达到一定值的时候,灯光亮度达到最大值,蜂鸣器开始报警。同时系统隔3S检测声音,当无声音是,关闭灯光和蜂鸣器报警。 | |
[[File: Applause_heat-sch.jpg|600px|center]] | [[File: Applause_heat-sch.jpg|600px|center]] | ||
| 第17行: | 第18行: | ||
|[[mCookie-CoreUSB/zh]]||1||核心板 | |[[mCookie-CoreUSB/zh]]||1||核心板 | ||
|- | |- | ||
| − | |[[mCookie- | + | |[[mCookie-Hub/zh]]||1||传感器转接板 |
|- | |- | ||
| − | |[[Microduino- | + | |[[Microduino-Sound/zh]]||1||声音检测传感器 |
|- | |- | ||
|[[Microduino-Color led/zh]]||1||led彩灯传感器 | |[[Microduino-Color led/zh]]||1||led彩灯传感器 | ||
| 第34行: | 第35行: | ||
*Setup 2:下载程序,将程序用IDE打开,或者直接拷贝到:[https://github.com/Microduino/Microduino_Tutorials/tree/master/MCookie_Tutorial/Applause_heat Applause_heat] | *Setup 2:下载程序,将程序用IDE打开,或者直接拷贝到:[https://github.com/Microduino/Microduino_Tutorials/tree/master/MCookie_Tutorial/Applause_heat Applause_heat] | ||
[[File: Applause_heat_ino.jpg|600px|center]] | [[File: Applause_heat_ino.jpg|600px|center]] | ||
| + | * Setup 3:加载代码,程序编译通过后选择好板卡和COM端口下载程序。 | ||
==程序说明== | ==程序说明== | ||
| 第65行: | 第67行: | ||
} | } | ||
</source> | </source> | ||
| + | *定时3S检测声音是否为噪音,若无则关闭灯光和蜂鸣器。 | ||
| + | <source lang="cpp"> | ||
| + | if (millis() - time > 3000 ) | ||
| + | { | ||
| + | voice_data = analogRead(mic_pin); | ||
| + | if (voice_data < voice) | ||
| + | { | ||
| + | colorWipe(strip.Color(0, 0, 0)); | ||
| + | num = 10; | ||
| + | noTone(buzzer_pin); | ||
| + | } | ||
| + | time = millis(); | ||
| + | } | ||
| + | </source> | ||
| + | |||
==搭建硬件== | ==搭建硬件== | ||
| − | *Setup 1:将BUZZER蜂鸣器接到Sensorhub的D6引脚上,将Colorled | + | *Setup 1:将BUZZER蜂鸣器接到Sensorhub的D6引脚上,将Colorled led彩灯接到D4,将MIC声音传感器接到A0引脚。 |
| − | [[File: | + | [[File:CoreUSB_Applause_heat.jpg|600px|center]] |
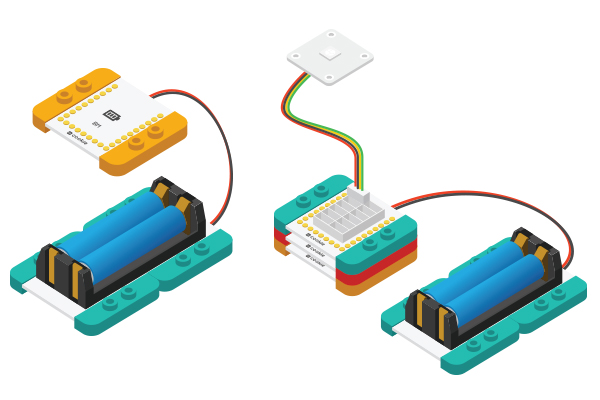
*Setup 2:将激活后的电池盒与BM模块相连. | *Setup 2:将激活后的电池盒与BM模块相连. | ||
| − | [[File: | + | [[File:CoreUSB_Ble_steup2.jpg|600px|center]] |
*Setup 3:将所有模块堆叠在一起,顺序随意,电路部分搭建完成。 | *Setup 3:将所有模块堆叠在一起,顺序随意,电路部分搭建完成。 | ||
| − | [[File: | + | [[File: CoreUSB_Applause_heat_all.jpg|600px|center]] |
| − | * Setup | + | * Setup 4:制作你的乐高鼓掌热度仪。 |
| − | [[File: | + | [[File: CoreUSB_Applause_heat_over.jpg|600px|center]] |
如果模块不能正常工作,请尝试断开并重新连接电源。 | 如果模块不能正常工作,请尝试断开并重新连接电源。 | ||
| − | [[File: Applause_heat_over1.jpg|600px|center | + | [[File: Applause_heat_over1.jpg|600px|center]] |
==结果== | ==结果== | ||
2015年9月8日 (二) 14:16的最新版本
| Language | English |
|---|
目的检测鼓掌声音,声音持续时间越长,灯光亮度越强。当灯到最亮时,蜂鸣器报警提醒。 原理通过MIC声音检测传感器来检测鼓掌声音大小,当超过预设的声音大小时,开始计数,时间越长数据越大,与此同时灯光的颜色也越来越亮了。当达到一定值的时候,灯光亮度达到最大值,蜂鸣器开始报警。同时系统隔3S检测声音,当无声音是,关闭灯光和蜂鸣器报警。 设备
准备
程序说明
#define PIN 4

Adafruit_NeoPixel strip = Adafruit_NeoPixel(6, PIN, NEO_GRB + NEO_KHZ800);

#define mic_pin A0
#define buzzer_pin 6
#define voice 400
  if (voice_data > voice)
  {
    num++;
    if (num > 255)
    {
      num = 255;
      buzzer();
    }
    colorWipe(strip.Color(num, 0, 0));
    //delay(10);
    Serial.println(num);
    time = millis();
  }
  if (millis() - time > 3000 )
  {
    voice_data = analogRead(mic_pin);
    if (voice_data < voice)
    {
      colorWipe(strip.Color(0, 0, 0));
      num = 10;
      noTone(buzzer_pin);
    }
    time = millis();
  }
搭建硬件
如果模块不能正常工作,请尝试断开并重新连接电源。 结果鼓掌声音越大,灯光亮度越强,当灯到最亮时,蜂鸣器报警提醒。当声音低于预设值,延时3S关闭灯光和蜂鸣器。你也可以通过乐高搭建一个漂亮的外观。 视频 |
