直流电机控制
目的本教程将教大家如何用processing来控制直流电机的转速。 设备
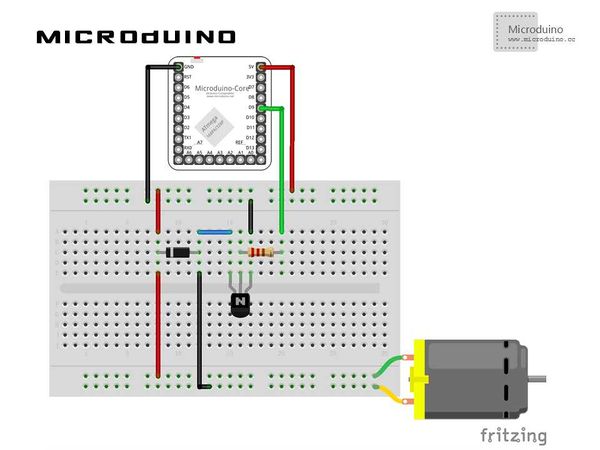
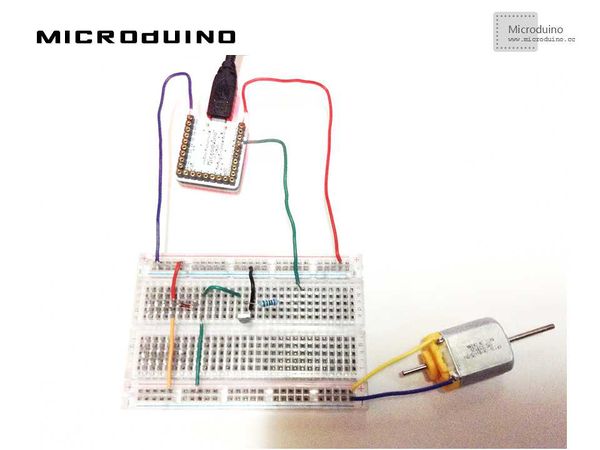
原理图程序调试步骤一:按着原理图搭建硬件环境,像这样:
本例需要两端的代码,Processing端和Microduino端 Microduino: //得到串口数据,并输出值给电机 if(Serial.available())//if serial is available
{
leitura=Serial.read();//read serial data
Serial.println(leitura);
vel=map(leitura,0,255,0,1023);//map
if(leitura>0)//run motor by leitura
{
analogWrite(motorPin,vel);
delay(1);
}
else//stop motor
{
analogWrite(motorPin,LOW);
}
}
Processing: //列出所有串口列表,得到第一个串口的数据 // List all the available serial ports in the output pane. // You will need to choose the port that the Wiring board is // connected to from this list. The first port in the list is // port #0 and the third port in the list is port #2. println(Serial.list()); // Open the port that the Wiring board is connected to (in this case #0) // Make sure to open the port at the same speed Wiring is using (9600bps) port = new Serial(this, Serial.list()[0], 9600); //绘制更新 void draw()
{
background(0);
update(mouseX/10);
println(mouseX);
}
//串口输出鼠标x坐标值,并绘制当前值 void update(int x)
{
port.write(x);
stroke(255);
line(mouseX, 0, mouseX, 160);
text (mouseX, mouseX, 180);
}
步骤三:下载代码并编译通过。 步骤四:运行后,在processing中左右移动鼠标,看电机的转速变化。 结果屏幕上会显示一个简单的速度指示剂,跟着你的鼠标x轴变化,电机的转速也随之变化。
视频 |

