Lesson 18--Microduino 4-way Responder
ObjectiveThis tutorial will teach you to do a four-way responder using 5 buttons based on Microduino. Four buttons are marked with the number 1 ~ 4 respectively, press the four buttons at the same time, digital tube will display the button number of the first press. The fifth button uses to reset. Equipment
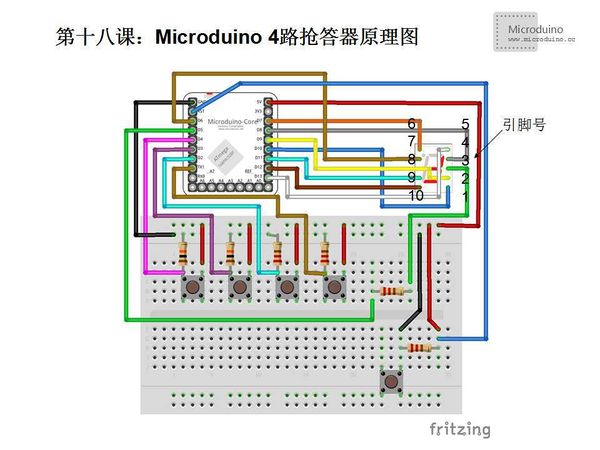
Schematic
Program#include "SevSeg.h"
SevSeg sevseg;
void setup() {
//Define used pins
sevseg.Begin(1,2,3,4,5,6,7,8,9,10,11,12,13);
pinMode(1, INPUT); //Pin 1 for button 1
pinMode(2, INPUT); //Pin 2 for button 2
pinMode(3, INPUT); //Pin 3 for button 3
pinMode(4, INPUT); //Pin 4 for button 4
sevseg.PrintOutput();
sevseg.NewNum(0, 4); // initial value is 0
}
void loop() {
//Enable output function
sevseg.PrintOutput();
//Reads the four button pin in cycle
for(int i=1; i<=4; i++) {
if(digitalRead(i)==HIGH) {//Press a button
while(1) {//Display the button number
sevseg.PrintOutput();
sevseg.NewNum(i, 4);
}
}
}
}
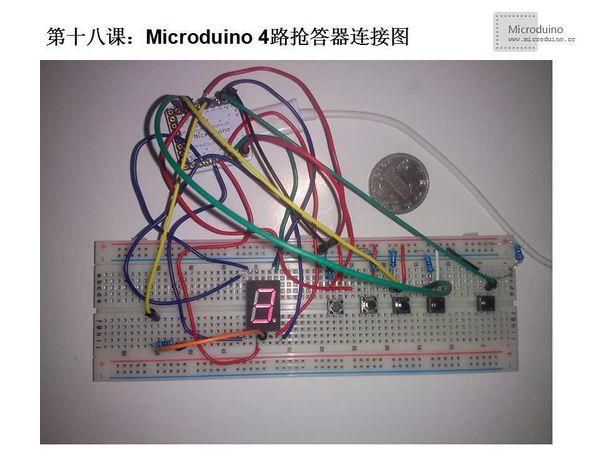
DebugFristly download the library, uncompress it and put to libraries folder of Arduino IDE, then restart Arduino IDE to load library. Library link:https://docs.google.com/file/d/0Bwrp4uluZCpNN1Q4dmFZX1MzWVE/edit This library can drive 4bits digital tube and support number, decimal point and easy to use. Step 1:Copy the code to IDE and compile it Step 2:Set up circuit, as follows: There are two buttons and use the same connection. One end connects to power and on the other end, a signal line and GND in parallel. Step 3:Run program Step 4: At beginning, the digital will display 0, press four buttons at the same time, the digital will display the button number of the fisrt pressed. ResultDigital will display the button number of the first pressed. The most right side is the reset button. Video |

